Using a brick smoker to cook and smoke meat is a fun weekend project that will make your BBQ taste great. By building your own brick smoker, you can make it exactly how you want it. If you know basic masonry skills and have access to common building supplies, you can make a great backyard cooker.
There are many steps in this guide that will show you how to build a brick smoker from beginning to end. These steps and tips will help you build a smoker that will be the talk of all your BBQs.
Things to Consider Before Building a Brick Smoker
There are a few key factors to think through before starting your brick smoker project:
-
Intended use – Will this be for personal/family use or larger parties? Size your smoker accordingly,
-
Fuel source – Most brick smokers are wood-fired. Ensure you have space to store fuel.
-
Placement – Pick a spot away from trees and structures. Follow fire codes and safety common sense.
-
Time commitment – Building a brick smoker takes multiple days of work. Ensure you can invest the necessary time.
-
Masonry skills – While DIY-friendly, this does require some bricklaying proficiency. Enlist help if needed.
-
Budget – Quality bricks, metal, chimney materials, and tools will cost $500-1000+ depending on size
Once you’ve considered these elements, it’s time to gather materials and start building your backyard brick beauty!
Step-by-Step Instructions for Building a Brick Smoker
Follow these steps to construct your own custom brick smoker:
1. Design and Layout
-
Decide on key factors like size, shape, door placement, etc. Rectangular is most common.
-
Sketch plans to visualize the full design. This will help guide brick placement.
-
Mark the ground where the smoker will be built using stakes and string.
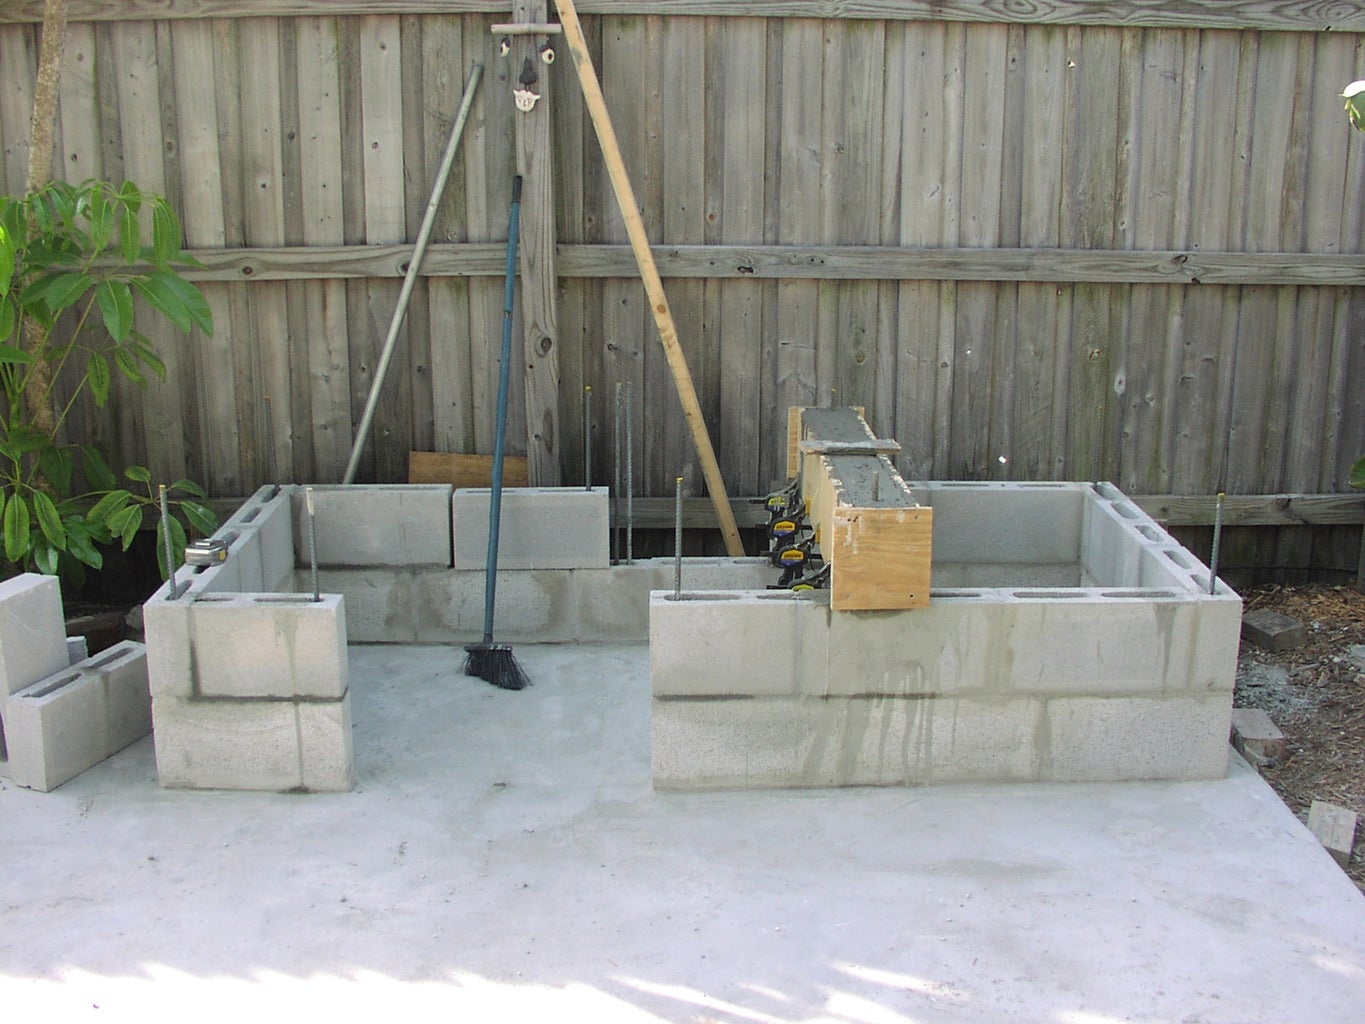
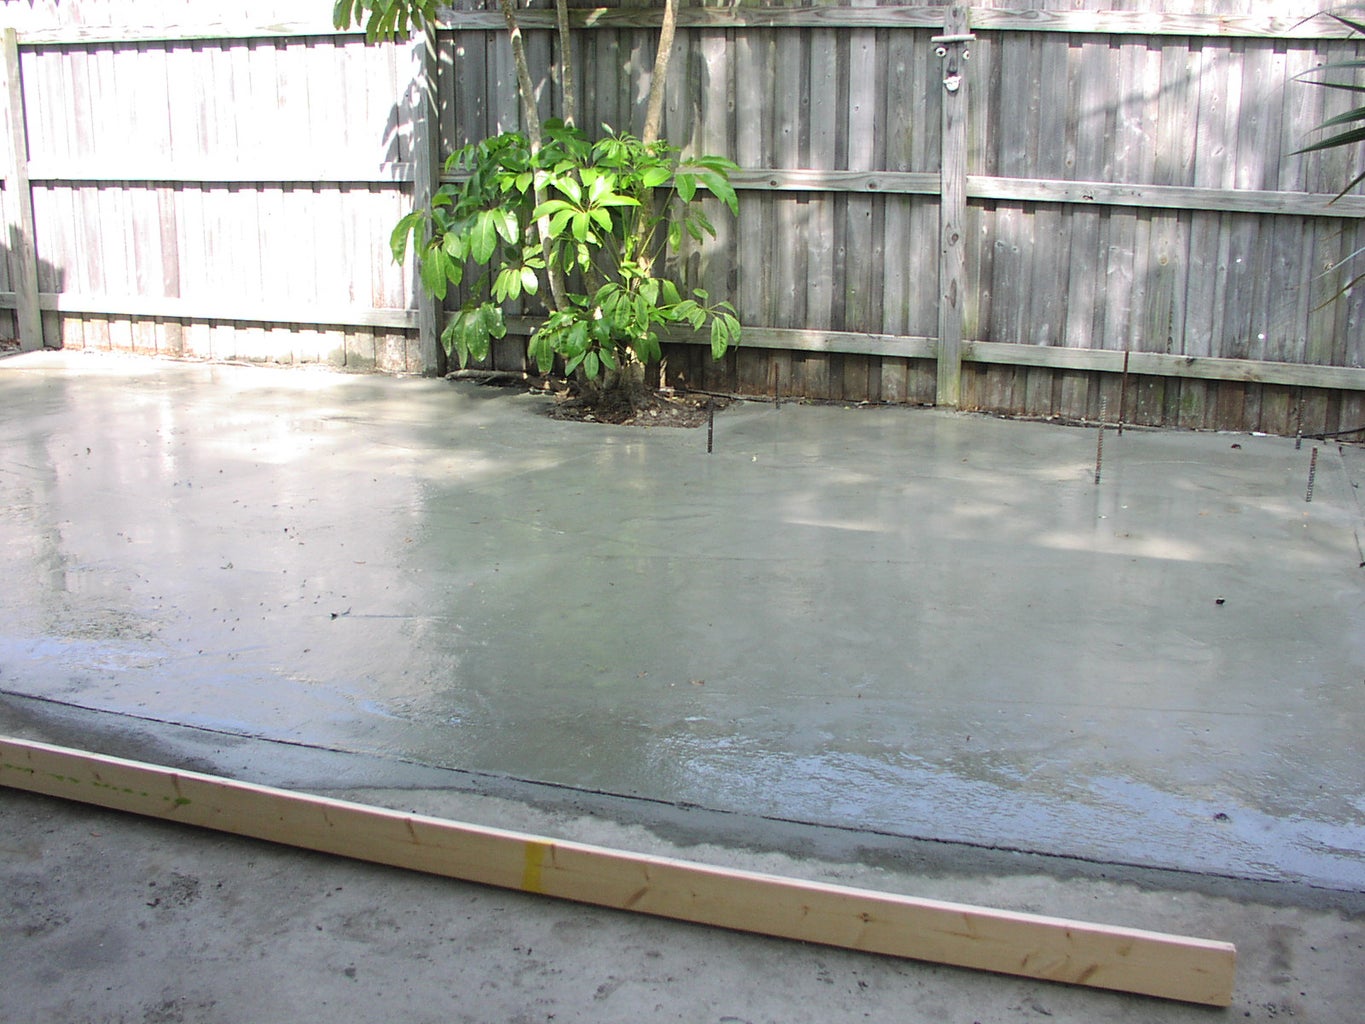
2. Construct the Base
-
Dig down 4-6 inches and fill with gravel for drainage. Compact gravel flat.
-
Build cinder block foundation as the base. Use mortar to glue blocks together.
-
Foundation should be wider than the smoker walls to support structure.
3. Build the Walls
-
Lay first layer of full brick around the base using mortar to adhere.
-
Build up walls, alternating brick direction each layer for strength. Keep walls plumb.
-
Build side walls that are up to 4 to 5 feet high, depending on the size of the smoker. Leave openings for doors.
-
Build the rear wall slightly lower to allow smoke to vent.
4. Install Doors
-
Cut and weld sheet metal to create doors. Hinge to wall opening.
-
Doors should seal tightly when closed to contain smoke and heat.
-
Add handles or pulls for safe handling when hot. High temperatures require gloves.
5. Construct the Chimney
-
Use metal ducting or brick to build chimney up the back wall of the smoker.
-
Extend chimney 1-2 feet above the smoker walls for proper draft.
-
Optional dampers can control airflow but usually not required.
6. Install Grates
-
Weld together steel rebar or grill grates for the cooking surface.
-
Position grates in the smoker above the firebrick floor.
-
Allow ample space above grates for food. Offset is optimal.
7. Apply Firebrick Inside
-
Use high-heat firebricks to line the interior floor and lower walls.
-
Firebricks reflect heat and can withstand very high temperatures.
-
Mortar firebricks together and seal all cracks or gaps.
8. Test and Fire It Up!
-
Fully inspect smoker for any leaks or deficiencies. Seal as needed.
-
Do a test fire without food to cure the mortar and dry out bricks.
-
Once cured, you’re ready for smoking! Season grates prior to first cook.
That’s it! Light up your smoker and enjoy some seriously tasty BBQ! To keep the smoker in good shape, keep it covered and repoint the mortar every so often. Your homemade brick smoker will give you years of good times and tasty smoked meat.
Tips for Operating Your Brick Smoker
Once built, follow these tips and techniques for the best performance from your brick smoker:
-
Use cured wood like hickory or applewood for optimal smoke flavor. Avoid resinous woods.
-
Keep air vents fully open during startup until reaching target temp.
-
Learn to control temperature using wood amount, vents, and chimney.
-
Use water pans or soak wood as needed to increase humidity for moisture.
-
Place heat-sensitive foods farther from the firebox area.
-
Brush ashes out of the smoker between uses for clean smoke.
-
Season or cure the smoker before the first cook if using mortar.
-
Experiment with wood mixes until you perfect your favorite smoked flavors.
-
Invest in quality temperature gauges for accurate readings.
With some practice controlling your custom brick smoker, you’ll be able to perfectly smoke any meat or vegetable to backyard pitmaster perfection. Enjoy your smoker build project and the delicious BBQ meals to come!

Step 5: 2nd Course
Step 2: Concrete Walk Poured
How to make an offset cinderblock smoker
FAQ
Can you make a smoker with bricks?
How to Build a Smoker Out of Bricks. Here, as follows, are some general instructions and explanations of how I built my vertical brick BBQ smoker. It wasn’t very hard to do, it cost me only about $200, and it works quite well as a medium-large-capacity BBQ (does 50–75 pounds of ribs very well in a batch).
Can I use normal bricks for a barbecue?
You can use regular brick and it will be fine. Just make sure you use a mortar that has heat resistant properties above that of a regular mortar. Sakrete makes a high heat resistant mortar.
What is the best material to build a smoker out of?
The materials you need will depend on the type of smoker you have, but some common ones are: Steel drum or metal sheets (for UDS or custom-built pits) Metal rods (to hold grates) Chimney or exhaust pipe Thermometer. Fireproof cement (if using bricks or concrete blocks).