Hey plant lovers! I’ve been growing bleeding hearts indoors for years, and let me tell you – these stunning plants with their heart-shaped blooms can absolutely thrive as houseplants with the right care. Today, I’m gonna share everything I’ve learned about successfully growing bleeding hearts inside. Let’s dive in!
Why Choose Bleeding Hearts as Indoor Plants?
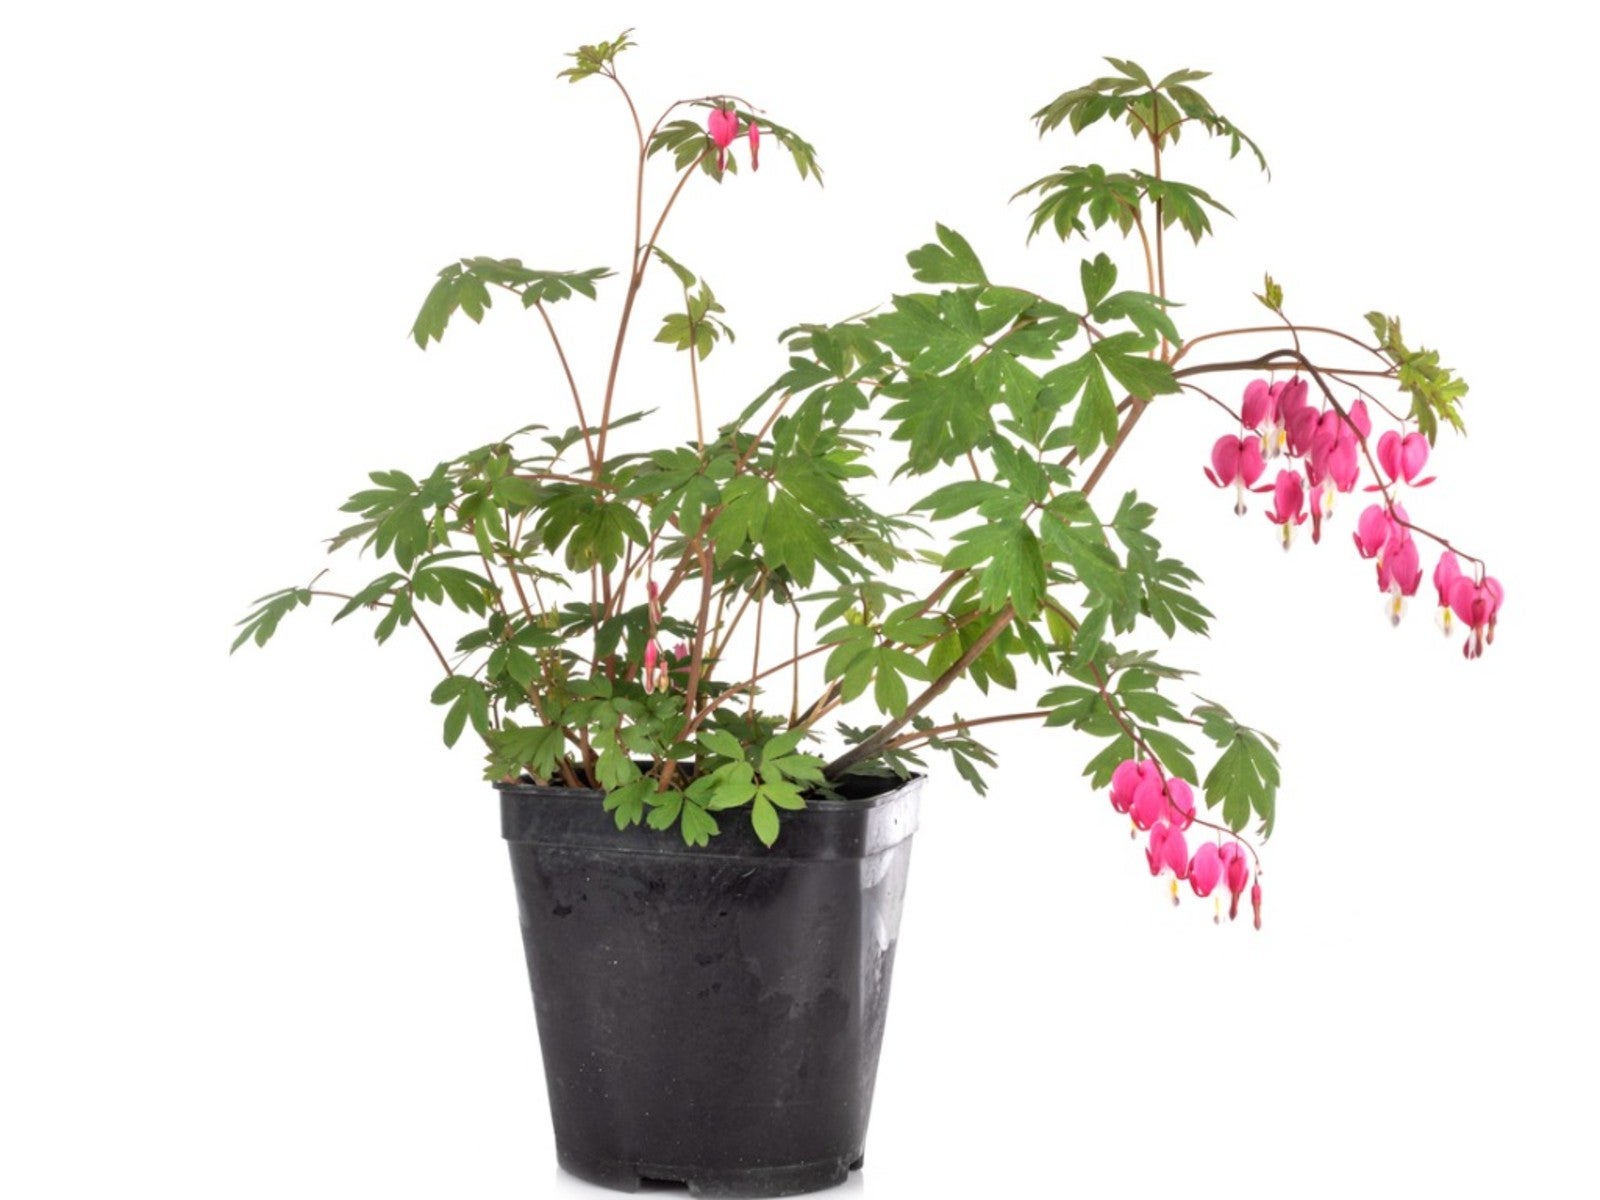
Here’s why I love keeping bleeding hearts indoors
- They bring unique charm with those lovely drooping heart-shaped flowers
- Work great in partial shade conditions common indoors
- Can grow 1-3 feet tall, making dramatic houseplants
- Bloom beautifully in spring with proper care
- Add a romantic, whimsical touch to any room
Essential Growing Requirements
Light Requirements
These beauties prefer bright, indirect light indoors. Here’s what I’ve found works best:
- 2-6 hours of filtered sunlight daily
- Morning sun is beneficial
- Avoid hot afternoon direct sun
- Position slightly away from windows to prevent scorching
- North or east-facing windows usually work great
Temperature & Humidity
- Keep temps between 55-75°F (ideal range)
- Avoid placing near heating vents
- Enjoys higher humidity like ferns
- Consider using a humidity tray or humidifier if air is dry
Soil & Potting
For happy indoor bleeding hearts:
- Use well-draining potting mix
- Add organic material for nutrients
- Mix in perlite or coarse sand for drainage
- Choose pot 2x wider than root ball
- Ensure pot has drainage holes
- Start with 12-inch deep container minimum
Proper Care & Maintenance
Watering Tips
- Keep soil consistently moist but not soggy
- Water when top inch feels dry
- Provide about 1 inch of water weekly
- Avoid wetting leaves to prevent fungal issues
- Ensure good drainage to prevent root rot
Fertilizing Schedule
- Feed monthly during growing season
- Use liquid all-purpose fertilizer
- Or apply slow-release granular fertilizer
- Mix fertilizer into soil around base
- Follow package instructions for amounts
Pruning & Maintenance
- Remove yellowing/dead stems
- Cut back dead foliage as needed
- No regular pruning required
- Clean up fallen leaves/flowers
Understanding Dormancy
One thing that surprised me when I first started growing bleeding hearts inside was their dormancy period. Here’s what you need to know:
- Plant naturally goes dormant after spring flowering
- Usually happens in late spring/early summer
- Yellowing foliage is normal during this time
- Don’t panic – plant isn’t dying!
During dormancy
- Trim off dead stems
- Reduce watering significantly
- Store pot in cool, dark place
- Check monthly and water if completely dry
- Wait for new growth in spring
Common Problems & Solutions
Even with proper care, you might encounter these issues:
Leaf Problems
- Yellowing leaves: Usually normal dormancy
- Scorched leaves: Too much direct sun
- Drooping leaves: Check watering schedule
Growth Issues
- Stunted growth: Check pot size/nutrients
- No blooms: Insufficient light/nutrients
- Leggy growth: Not enough light
My Top Tips for Success
After years of growing these beauties, here are my best tips:
- Start with a large enough pot
- Focus on drainage – it’s crucial!
- Don’t overwater or underwater
- Accept and plan for dormancy
- Monitor light exposure carefully
- Keep away from heat sources
- Be patient during establishment
Safety Considerations
Just so you know, bleeding hearts have chemicals in them that can be harmful. Keep these safety tips in mind:
- Keep away from curious pets
- Wash hands after handling
- Don’t plant where kids might eat leaves
- Keep trimmed portions away from animals
Final Thoughts
At first, growing bleeding hearts indoors might seem hard, but I promise you it’s not! With the right care and attention to their basic needs, you can enjoy these romantic flowers right in your living room. Remember, they’re pretty easy to take care of—just keep an eye on their basic needs like water, light, and temperature—and you’ll be rewarded with those beautiful heart-shaped flowers.
If you have any questions about how to grow bleeding hearts indoors, please leave them below. We love helping other plant lovers succeed with their indoor gardens.
Happy growing!
Note: This guide is based on my personal experience and research. Your results may vary depending on your specific indoor conditions and care routine.
Would you like me to explain or break down any specific aspect of indoor bleeding heart care in more detail?
Pruning, Cleaning, and Grooming
Bleeding hearts require minimal pruning, but a bit of grooming will keep the plant healthy and tidy. Here’s what to do:
- After Bloom Deadheading. Once the pink and white hearts have all bloomed and may have started to fall off, you can deadhead the plant by cutting off the flower stems that are no longer in bloom. You don’t have to do this; it won’t usually make the plant bloom again (bleeding hearts only have one main bloom flush a year), but it can make the plant look better and focus its energy on its leaves and roots. Cut the thin flower stalks back to where they meet the main stem with clean scissors or pruning shears. If you like the way the heart seed pods hang down or want the plant to maybe make its own seeds, you can leave a few spent flowers on. Self-seeding isn’t a big deal indoors unless you have a lot of pots, but deadheading is mostly for looks.
- Foliage Pruning (End of Season). When the plant goes dormant, the most important thing to do when pruning is to get rid of the yellowed or dry leaves. As we already said, let the leaves turn yellow on their own. When they’re mostly yellow or brown and no longer feeding the plant, cut the stems back. Cut all the way down to or just above the plant’s base (soil level). The stems are fleshy; they should cut easily. Getting rid of the dead leaves keeps rot and pests from taking up residence in the rotting matter. It also makes the pot look better while it’s not being used. If a stem is only partly yellow (still half green), try to wait a little longer. But if you can see that some leaves are sick (blackened or moldy), you should cut them off right away, even if they are still green, to stop the disease from spreading.
- In-Season Grooming. While the plant is growing, check it every so often for any leaves that are turning yellow or any pieces of foliage that look like they might not be healthy. Over time, it’s normal for some inner leaves to turn yellow and old. You can gently pull those leaves off or trim them. This improves airflow and appearance. Also, take off any leaves that have big holes or damage from pests, and deal with the pest or fungus problem separately. Cleaning the plant’s leaves with a damp cloth every so often can help it absorb light better (household dust can block light over time), and it also lets you check the plant closely for early signs of pests.
- Cleaning the Area. When the plant drops leaves or when you water it, clean up the area around the pot. Old leaves can be a home for fungus or bugs, so get rid of them. Clean, airy conditions help prevent problems.
Remember to always use clean, sharp pruning shears or scissors when cutting the plant. If you’ve used the tool on any other plant that had disease or pests, sterilize it with isopropyl alcohol or a diluted bleach solution before pruning your bleeding heart.
This prevents inadvertent spread of issues. Fortunately, bleeding hearts don’t require shaping or frequent trims – just these maintenance tasks.
One more note: The bleeding heart has fragile stems, so handle the plant gently when moving or rotating it. If a stem accidentally snaps (this can happen if it’s bumped), simply trim it off. The plant will usually be fine; it might bleed a little sap at the break, but that will heal.
You can avoid a lot of breakage by giving the plant enough space and not crowding it among other objects.
Some people who grow plants indoors use a small support ring or stake for bigger bleeding heart plants. A thin hoop or a couple of stakes with twine can hold up heavy flower stems so they don’t fall over or break when the plant gets tall and full of flowers.
You don’t have to do this, but it’s best to if your plant gets very big or is in a place that gets a lot of wind (like near an indoor fan). , could cause some movement).
Overall, keep your bleeding heart clean and trimmed of dead material. This not only makes it look nicer but also keeps it healthy by preventing rot and pest habitats.
Propagation (Making New Bleeding Heart Plants)
If you’d like to create more bleeding heart plants or rejuvenate an older one, you can propagate it through division or cuttings (or even seeds, but we’ll focus on division and cuttings as requested). Both methods are suitable for Lamprocapnos spectabilis and can be done by beginners with a bit of care.

Division is the easiest and most common way to propagate a bleeding heart. It involves cutting the root clump of an established plant into two or more pieces, so that each piece can grow into a new plant.
Division not only creates new plants but also helps an older potted bleeding heart by giving its roots more room (preventing it from becoming root-bound and reinvigorating its growth).
Bleeding hearts tend to form larger clumps over a couple of years, so dividing every 2–3 years is often recommended.
When to divide: The best times to divide a bleeding heart are either in early spring (just as new growth begins to peek out) or in early fall (after the plant’s foliage has died back). If you are growing it indoors, you can time it with its dormancy.
For example, you might remove it from its pot and divide in late winter before it starts actively growing (when you’re about to bring it out of dormancy), or right after it has gone dormant and been cut back in the fall.
Early spring is generally preferred because the plant is about to grow vigorously and will recover faster. Avoid dividing while it’s in full leaf and flowering, as that can stress the plant more.
How to divide:
- Unpot the Plant. Carefully remove the bleeding heart from its pot. If it’s big, you might have to tip the pot over and carefully pull the root ball out. You might see thick roots going around. Be careful not to break any of the roots, but some will break anyway, and that’s fine.
- Separate the Roots. Once out, inspect the root clump. If it’s a big clump, you should see several “crowns,” or growing points. These look like thick buds or pink bumps where stems have come out. Choose how many divisions you want. Usually, it’s easy to handle splitting one plant into two or three parts. Cut the root mass in half with your hands or a clean, sharp knife or spade. Each division should have at least one or two strong buds or eyes and a good amount of roots attached. At times, you can just pull sections apart along the lines where the plant seems to have made offsets. At other times, you may need to cut directly. If you have to cut, a straight line through the root ball is fine.
- Trim and Prep. If any roots are too long or broken, you can cut them off a little. Also, cut off any remaining old stems or foliage. You essentially have bare-root pieces now.
- Replant the Divisions. Plant each piece right away in a pot (or the ground if you’re moving some outside). Use new potting mix that has the same ingredients we talked about earlier (rich, well-draining, etc.). ). Pick the right-sized pot for each section (they might not need as big of a pot as the whole thing if you split it up); e g. For example, if you took a 12-inch plant and cut it in half, each half might go into an 8–10-inch pot. When you plant each division, make sure that the crown is just below the soil surface by about an inch. The buds can be just visible on top of the soil or just below it.
- Water and Wait. Give the new divisions a lot of water to settle the soil around the roots. Keep them in a cool, shady place at first (no direct sun), and keep the soil lightly moist for a few weeks while they get established. You might not see new top growth right away if you did this in the fall. If that happens, they’ll stay dormant until the following spring. If you divided them in the spring, you should see new shoots grow quickly. The plant may have fewer or smaller blooms the first year after being divided, but it will be fully recovered by the next growth cycle.
Tip: Division is best done on a healthy, robust plant. Don’t try to divide a very young plant (wait at least until it’s a couple years old or has a sizable root mass) or a plant that is weak or diseased.
Also, after dividing, you can give the divisions a dose of diluted fertilizer once you see active growth, to help them along (but not too strong, since the fresh root cuts can be sensitive). Dividing should ideally be done infrequently – each plant likes some time to settle and expand.

Propagating bleeding hearts from stem cuttings is another way to get new plants. It can be surprisingly successful if done correctly, though it requires a bit more patience and care than division. You’ll essentially be cloning the plant from pieces of its stems.
When to take cuttings: The optimal time to take softwood cuttings of bleeding heart is right after the plant has finished flowering, when there is fresh new growth that’s not too woody. Typically, this means late spring to early summer, when stems are still green and pliable.
Stems should be mature enough to not be flimsy, but young enough to bend and not snap (that’s what “softwood” implies). Early morning is a great time to take cuttings because the plant is well-hydrated then.
How to take and root cuttings:
- Prepare Pot and Medium. Prepare a small pot or tray with rooting medium that drains well. Half peat moss (or coco coir) and half perlite (or coarse sand) is a good mix. This mixture will hold some moisture but stay airy. Fill your pot with the mix. Make it damp but not soggy. Ensure the pot has drainage. You can even use a pencil to make a few holes where the cuttings will go ahead of time so that you don’t have to stress them later.
- To choose cuttings, cut healthy new shoots about 3 to 5 inches (8–13 cm) long with clean, sharp scissors or pruners. Pick stems that don’t have flower buds on them, or cut off the buds if they do, since they take fuel away from rooting. Cuttings should have a few leaf nodes, which are the places where leaves connect to each other. Cut just below a node, as that’s where roots will likely grow.
- Strip Lower Leaves. The leaves on the bottom half of the cutting should be cut off. Leave one or two pairs of leaves on top. This keeps the cutting from losing water and focuses it on root growth.
- Optional – Dip in Rooting Hormone. Dip the cut end of the cutting into rooting hormone powder or gel if you have it. Tap off any excess. This hormone can help you root faster and be more successful, but you can still be successful even if you don’t have it.
- Insert Cuttings. Put the cutting into the hole you made in the potting mix, or gently push it into the mix until it’s about 1 to 2 inches deep. This should cover the part where the leaves were cut off. Firm the mix around it so it stands upright. If there is room, you can put more than one cutting in the same pot. Just make sure the leaves don’t touch to avoid rot.
- Create Humidity Dome. Cuttings root best in a humid environment. Put a clear plastic bag or dome over the pot to keep the moisture in and turn it into a mini-greenhouse. Take sticks, straws, or wire hoops and hold them above the leaves so the plastic doesn’t touch them. If you want air to flow, poke a few small holes in the plastic or open it for a short time every day. Vent it a bit if there is too much condensation (water dripping inside), because cuttings can rot if it gets too wet.
- Light and Temperature. Put the pot somewhere bright and out of the direct sun. Direct sunlight can heat up the cuttings under the plastic. A place inside with good light but no direct sunlight is best, or put a fluorescent light a ways away. Maintain a warm temperature of about 65–75°F (18–24°C) for rooting. At night, don’t let it get below 60°F, because the cold can kill or slow down the cuttings.
- Monitoring. Check the cuttings daily. It’s important to keep the medium damp but not soaked. As long as it’s sealed, you probably won’t need to water it for a week or two. If it’s getting dry, though, spray the soil with water instead of the leaves. If you see mold or rot, cut it out and make sure there is more air flow. Try gently pulling on a cutting after about one to two weeks. If you feel resistance, roots may be starting to form.
- Rooting Time. When things are right, bleeding heart cuttings usually grow roots in 10 to 21 days. Growing new leaves is a good sign that the plant has rooted. It’s a sign of success when you can see new growth or roots sticking out of drainage holes.
- Potting Up. Once the cuttings have roots, take off the plastic cover and slowly get them used to normal humidity (first for a few hours without the cover, then more each day). Next, move each rooted cutting to its own pot filled with regular potting mix. Be careful not to break the new roots as you handle them. Give them water in their new pots and treat them like a young bleeding heart plant.
Not every cutting will take, so don’t be discouraged if you lose a couple. Take a few extra to be safe. Once potted, the new plants may remain small their first year and perhaps may not bloom until the following season – that’s normal, as they establish their roots.
Propagation by cuttings is a fun way to multiply a favored variety (since cuttings will be clones of the parent, they’ll have the same flower color, etc.). It’s also useful if you want to have indoor bleeding hearts that you eventually plant outside or give to friends.
Bonus: Bleeding hearts can also be grown from seed, but seeds need a cold stratification (chilling) period and can take longer to reach flowering, so cuttings and division are faster ways to get flowering-size plants.
How to Grow & Care For Bleeding Heart | Perennial Garden
FAQ
Can you grow a bleeding heart as a houseplant?
Common bleeding heart (Lamprocapnos spectabilis) is a spring-blooming herbaceous perennial that forms arching stems from rhizomatous roots. The plant is a fast grower that typically reaches 2 to 3 feet tall within around 60 days. Although it flourishes best outdoors, you can keep a bleeding heart plant indoors as well.
Do bleeding hearts come back every year?
Yes, bleeding heart plants are perennials and will come back year after year. They naturally die back in the summer, going dormant during the hotter months, but will reappear in the spring.
What happens when you touch a bleeding heart flower?
A word of caution: Although bleeding hearts appear delicate and harmless, all parts of the plant are toxic to pets and humans if eaten. Touching them may cause skin irritation, so wear gloves as a precaution.
What is the best place to plant a bleeding heart?
Bleeding heart grows best in light shade, although it will tolerate full sun in moist and cool climates. In most locations plants prefer morning sun and afternoon shade. They also need well-drained soil and will rot if the soil remains too soggy.
Can bleeding heart grow indoors?
You can grow bleeding heart indoors and often with great success and ease, though the plant will likely grow faster and larger under optimal outdoor conditions. The bleeding heart plant does best in partial to full shade, so you won’t have to worry too much if your windows get direct sunlight.
How do you plant bleeding hearts?
Plant your bareroot Bleeding Hearts in fall, when the plants are dormant. Set your Bleeding Hearts up for success when you plant them by aerating the planting area and mixing in compost or other organic matter to help the soil hold moisture. If you’re planting in a container, use compost along with potting mix.
Can a bleeding heart grow in a garden?
These heart-shaped flowers are often grown in gardens, but they can also do well as houseplants. The common bleeding heart (Lamprocapnos spectabilis) is a spring-blooming herbaceous perennial with stems that arch from rhizomatous roots. The plant is a fast grower that typically reaches 2 to 3 feet tall within around 60 days.