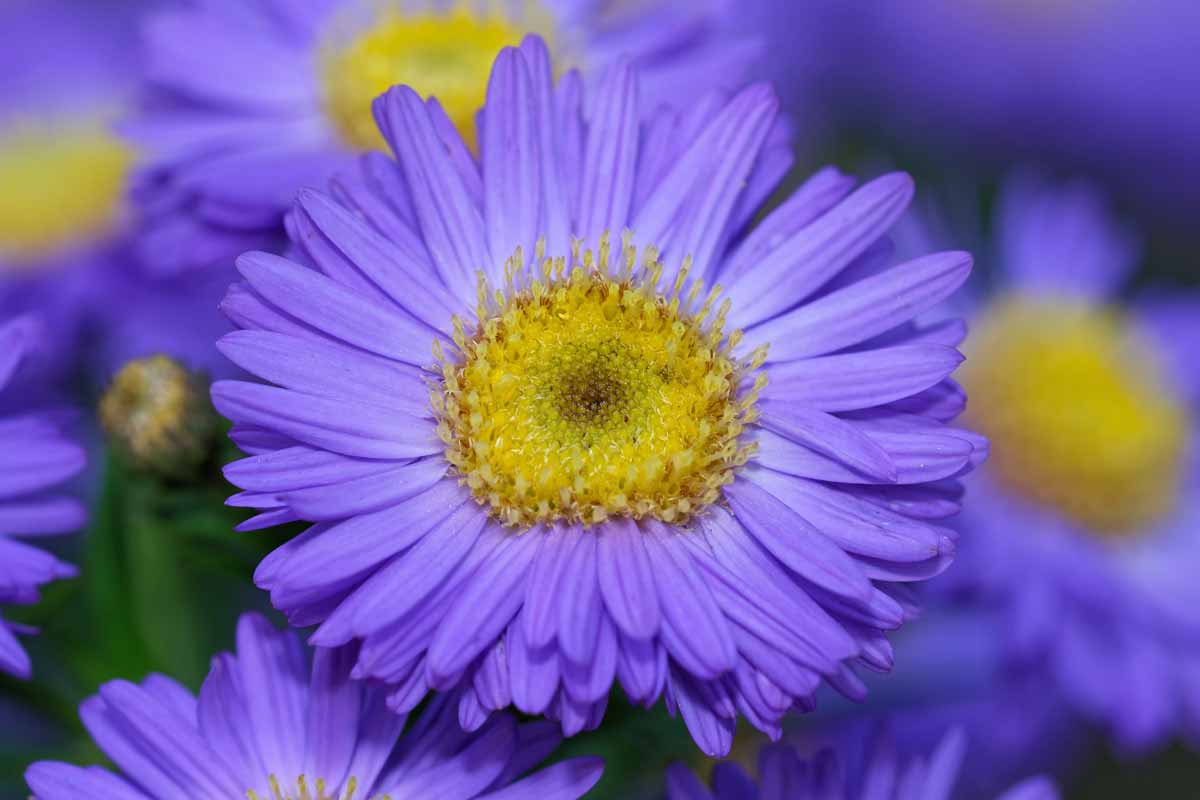
Asters are classic flowering plants that bloom in late summer and fall. They belong to the Asteraceae family which includes other popular flowers like daisies sunflowers, and chrysanthemums. With over 600 species, asters come in a wide variety of sizes, shapes, and colors. When starting asters from seed, it’s helpful to know what aster seeds look like so you can properly identify them.
Aster Seed Characteristics
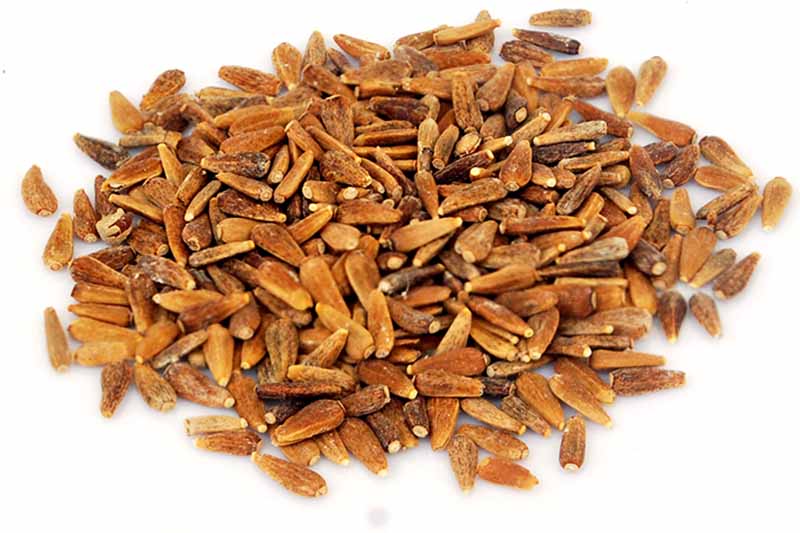
Most aster seeds are tiny, ranging from 1 to 3 mm long They have a narrow, elongated shape and pointed tips Fresh aster seeds appear dark brown or black. As seeds dry and age, they tend to lighten in color to tan or light brown. The seed coat has a matte finish rather than a shiny exterior.
Under magnification, aster seeds reveal an oval shape with ridges running along their length. At the broad end opposite the point, there is a small scar where the seed detached from the parent plant. This scar is called the hilum.
While aster seeds are tiny, they usually have some visible stripes, spots, or other markings. These help distinguish between different aster species. For example:
-
New England Aster seeds are about 2 mm long with faint stripes.
-
China Aster seeds are 1 to 1.5 mm long with tiny dots covering their surface.
-
Michaelmas Daisy seeds are around 3 mm in length and have irregular darker spots.
Aster Seed Heads
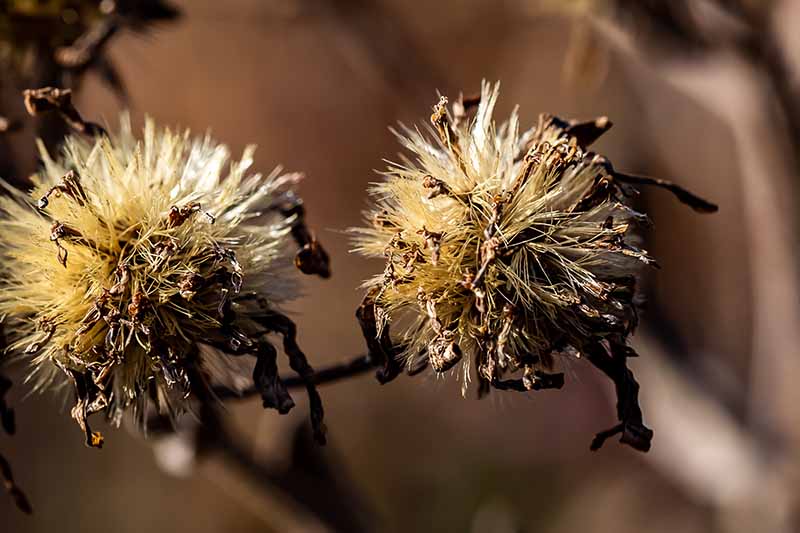
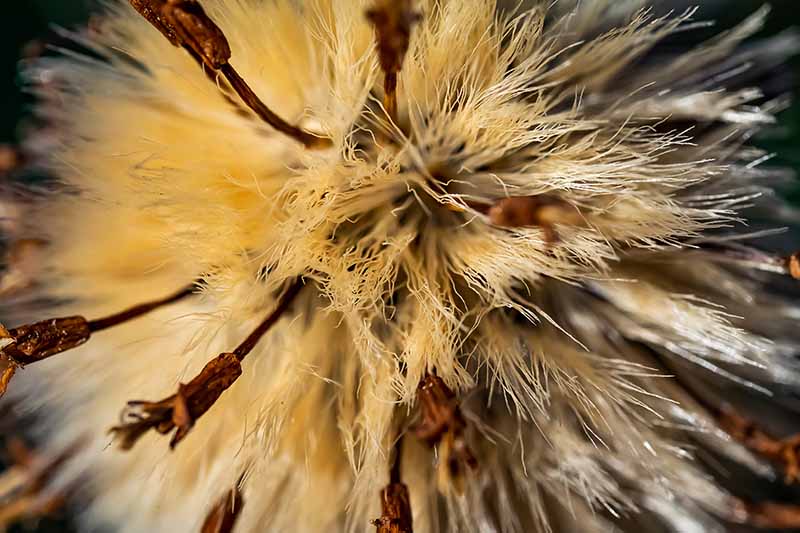
Aster seeds don’t fall neatly to the ground when ripe like some flower seeds. Instead, they release from dry, fuzzy seed heads that develop after the petals drop off. These seed heads contain dozens of minute seeds embedded in fine hairs or bristles. As the seed head dries and the bristles detach, the seeds disperse on the wind.
Different types of asters have different sized, shaped, and colored seed heads. But in general, you should see heads that are round or oval and range from 0 5 to 1 inch across. They may be cone-shaped or flat-topped. When seed heads are new, they usually look green. As they dry, they turn beige, brown, or gray. The bristles give dried heads a fluffy, fuzzy look.
To collect aster seeds, you can harvest entire mature seed heads when at least half the heads on a plant have turned brown. Or, you can crush or rub the dry heads over a container to release the seeds from the bristly pappus. Sifted debris can be winnowed away by blowing gently across the seed container’s opening.
Storing Aster Seeds
As with most seeds, aster seeds will grow best if they are kept in a cool, dry place. Put the seeds in a container that won’t let air in, like a glass jar or a plastic bag with a zipper. Try to get rid of as much extra trash and chaff as you can, since they can help mold grow. Label containers with the seed variety and year collected. Aster seeds can be used for one to three years after being stored properly before they become less likely to sprout.
Aster seeds can last longer if they are kept in a container that keeps air out and moisture out. Use seeds within 3 to 5 years when refrigerated. For storage of five years or more, freezing aster seeds will keep them alive.
Sowing Aster Seeds
Aster seeds can be directly sown outdoors in prepared garden beds after the danger of frost has passed. Or for a head start, sow seeds indoors 6 to 8 weeks before the last expected spring frost. Aster seeds need light to germinate, so press them into the soil surface without covering.
When the seedlings come up, set them far enough apart for the variety. Give asters full sun and well-drained soil. Water regularly so the soil stays evenly moist. Pinching back tips encourages bushy, compact growth. Put mulch around the base of plants to keep water in and keep weeds away.
With their petite size, striped surface, fuzzy seed heads, and love of cooler weather, aster seeds reveal some of the charming qualities of these beautiful fall-blooming flowers. Learning to identify aster seeds helps both gardeners and nature enthusiasts appreciate another stage of their natural life cycle.

How to Save Aster Seeds
The first rule of seed saving is that only true species produce true to seed.
Let me explain. This only means that if a plant has been changed in any way, like crossed-bred with another plant, its seeds might not grow into “true” copies of the parent plant.
Hybrids are cultivated varieties created by crossing two or more different plants. Their seeds might grow plants with traits from either parent, or they might not grow at all, but they won’t have the traits of the hybrid.
If you have native plants, you can be sure that the seeds you collect will grow plants with the same traits. Otherwise, there might be surprises.
Cultivated varieties are propagated by dividing or cutting.
Dividing is slicing straight down through the roots, removing the separated section, and establishing a new plant. You can read more about it here.
A cutting is made by snipping off new growth, dipping it in rooting hormone, then placing it in a container of potting medium. Eventually, it will form roots of its own.
How do you know if your plants are native or cultivated?
Generally speaking, native varieties are more “weedy.” They tend to get quite tall, have branching clusters of small flowers, and spread easily. If your plants are well-behaved, chances are they’re hybrids!
The Time Is Right
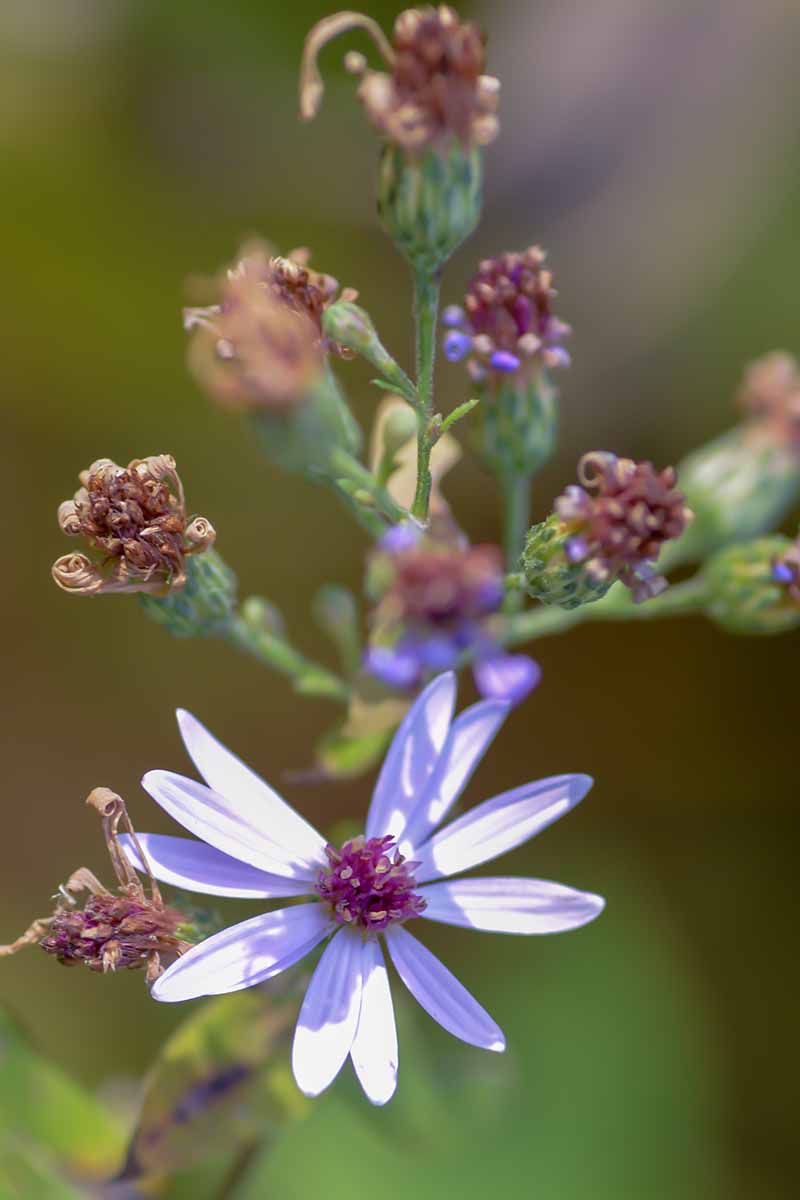
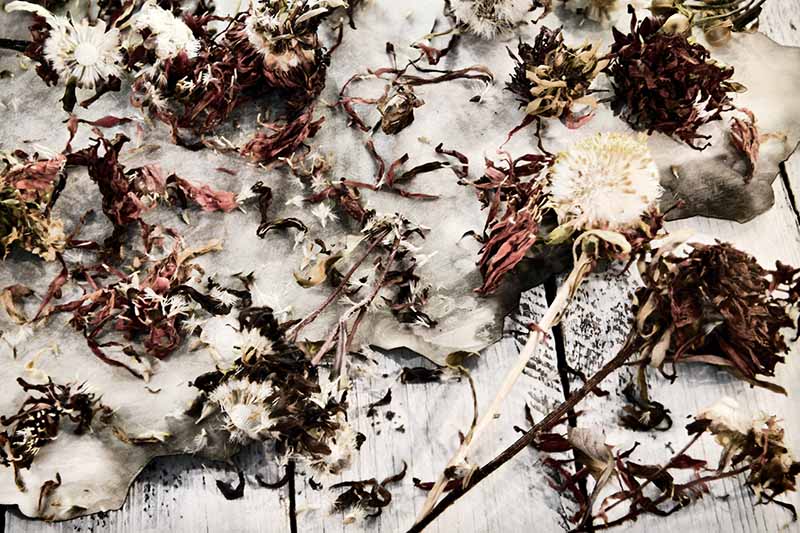
Knowing when to harvest is easy. You’ll see them starting to dry out as the first frost date approaches. After each flower blooms, its petals dry, fade, and drift away. When the once-golden center disk turns brown, the seed head has formed, and you can begin.
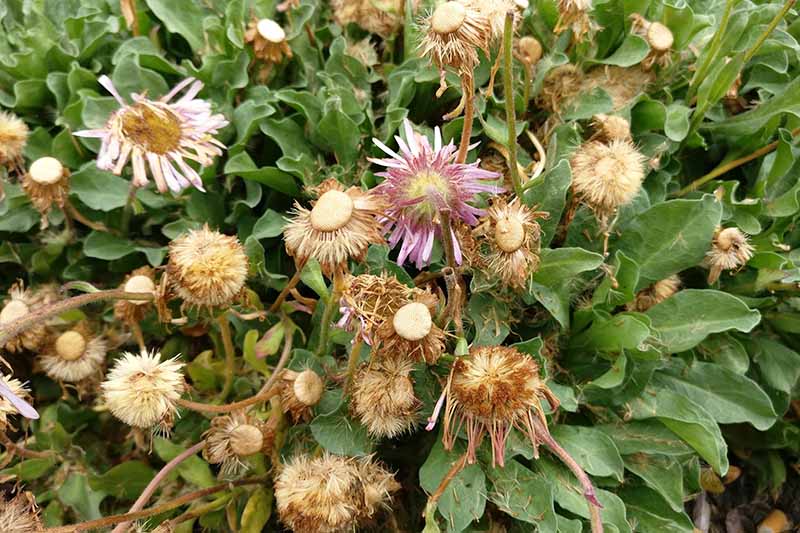
After a while, the head starts to disintegrate, resembling fluffy tufts of cotton. The fibrous wisps help the seeds to take flight on the first breeze, to self sow wherever they land.
There are three preferred methods for aster seed collecting:
- Stalk Harvesting
- Flower Head Snipping
- Seed Head Crumbling
I recommend wearing gloves, because no one knows if they’re allergic to a plant until a tell-tale rash appears. It’s always best to err on the side of caution.
The first method is to cut entire stalks bearing clusters of blossoms. This is an excellent choice for when frost is predicted and you don’t want your plants to turn to mush before you have a chance to harvest.
It’s also beneficial when not all flower heads have gone to seed, because the fresh ones continue to dry on the harvested stalks.
Some folks with large expanses of flowers like to wait until the entire garden looks dried up, and the asters are all cottony. The advantage of this is “one fell swoop” gathering.
The disadvantages are the possibility of missing quite a few that have already sailed away, and waiting too long and potentially losing all of them to frost.
The second is to collect individual flower heads by holding a paper grocery bag beneath a plant with one hand, and snipping off individual dry flower heads with the other.
Gardeners with smaller plots often pluck the dried heads as they appear. The upside is that self sowing is kept to a minimum, but this requires an exercise in vigilance many would likely find tedious.
This can be a periodic task, in which you remove dry heads as they appear, or an end-of-season event, in which you collect both dry and fresh heads in anticipation of a frost.
By leaving the stalks intact, your garden will still have some winter interest and places for wildlife to shelter.
The third method is my favorite. I don’t mind some self seeding, so I wait until I see quite a few brown heads, harvest what I want, and let the rest go.
I take a paper grocery bag, hold it under a plant, and rub the dry heads between my thumb and fingers until they loosen and fall in. You can do this periodically, leaving fresh blooms alone, or at season’s end.
Once gathered, it’s time to prepare them for storage.
First of all discard any heads that are damp or moldy.
The following steps will help to ensure that your harvested seed will be fresh next season, and ready for planting:
Flower heads that have gone to seed may look brown and dry on the outside, but might still be moist with life on the inside. To make sure they are completely dry before storage, you’ll need to find a cool, dry location with good air circulation, where they will be undisturbed for one week.
Let’s return to our three collection methods and see how to proceed:
For harvested stalks, simply bind them together with twine, like bouquets, and suspend them upside-down from nails, hooks, etc. Place newspaper or a clean cloth below to catch loose seed.
You can also bind a paper bag around the stalks to catch them, however, this inhibits air circulation, and may increase the drying time.
For snipped flower heads and crumbled heads, lay out newspaper and spread the contents of your bag(s) over it in a single layer, so all parts receive maximum contact with cool, dry air.
After a week, the heads should be dry and ready for the next step. They’ll probably have the cottony fluff we mentioned still attached, as well as pieces of dry stem and leaf. In other words, it’s a hot mess.
If you find the pieces have not all dried, either allow more time, or discard any material that is still soft, and/or moist.
If you did stalk harvesting, here’s what to do now:
- Pull each stalk “bouquet” down and place it on top of the newspaper. Then, use your thumb and index finger to rub the seed heads together to get the seeds out.
- Discard the stalks.
- Tear up the dropped seeds and get rid of as much “chaff” as you can by blowing softly across the newspaper to get rid of the lightest fluff.
For snipped flower heads and crumbled heads:
- Use your thumbs and fingers to rub the seed heads together, getting rid of as much dirt as you can as you go.
- Gently blow across the paper to remove remaining fluff.
Once you have removed the excess debris, it’s time to put the seeds away for next season.
What’s the best way to store them?
In airtight containers in a cool, dry location, like a shed or basement. Beware of recommendations to store them in a refrigerator, as it might be too moist.
There are a variety of options, including:
- Envelopes
- Glass jars
- Metal tins
- Zippered plastic bags
My experience with envelopes has taught me that they are great for indoor storage, where the mice can’t get them. I like that they are opaque, easy to label, and slim to store.
However, even when I used sticky tape instead of sealing them shut, they were hard to open and close as needed. If you like to use just a few at a time in a smaller garden rather than planting the whole lot at once, this might not be the best option for you.
On the other hand, envelopes make a fantastic container for those who wish to give their saved seed as gifts to friends and neighbors.
I’ve always liked to use old baby food jars for storing small seeds. I can identify the contents by marking the lid, see at a glance how many I have, and open and close them as often as needed. They are impervious to insects and rodents, and are inexpensive.
However, as they are clear, I have to keep them inside a cabinet in my shed, instead of on the potting bench near the window. In addition, if I drop one – yikes! Breakable options certainly aren’t for everyone.
If you’re a fan of fancy teas, empty tins may be the perfect choice. They’re opaque, easily labeled with a marker, and seal tightly.
All that and cost effective too? What’s not to love?
I’m a fan of zip bags. I wash mine out and reuse them over and over for household storage. They come in sizes ranging from minute to ginormous, so there’s always one that’s just perfect.
The tight seal and ability to squeeze out excess air for compact storage make these a useful option.
But, the clear quality of the plastic makes it necessary to store in a dark place. Also, the bags are slippery, and unless you like a challenge, they can be hard to manage when you’re wearing garden gloves.
Plan to use harvested seeds the following growing season for best results. And if you’ve got way more than you need but just hate to see them go to waste, package them attractively for hostess gifts or party favors for your gardening friends.
How to Grow Asters from Seed
FAQ
Can I scatter aster seeds?
Whether planting indoors or outdoors, cover the seeds with 1/8 inch (0. 3 cm. ) of fine soil. Aster seed sowing by scattering the seeds in a wildflower planting is also perfectly fine.
Is aster hard to grow from seed?
China Asters are easy to grow from seed in trays. Bury seeds about ⅛ deep and keep seeds moist and warm until germination occurs in 10-14 days.
How long do aster seeds take to flower?
Make sure you have the support in place when you sow seed or transplant seedlings to avoid disturbing the plant’s roots later. Aster plants should flower in approximately 100 days.