Hydrangeas are sought after for their big, showy flower heads that give gardens a splash of color. Many gardeners like to take cuttings from hydrangea plants that are already there to make more of these beautiful plants for free. The key to success is making sure the cuttings are properly overwintered so they make it through the winter and have strong roots by spring.
Overwintering provides the conditions hydrangea cuttings need to establish roots while remaining dormant when frigid winter temperatures hit. With the right technique, you can have a high rate of rooted cuttings ready to transplant in spring.
This comprehensive guide provides tips on taking cuttings, overwintering methods, troubleshooting problems, and caring for your hydrangea cuttings so they will flourish the following growing season.
When to Take Hydrangea Cuttings for Overwintering
When you take cuttings is important if you want to keep them over the winter. Late summer to early fall is ideal in most climates. This gives the stems of the cuttings time to get tough before the worst winter weather.
The optimal window is after the first frost when the plant goes dormant but before the ground freezes Mid-October is typical for northern zones In warmer climates, late November may work better.
Taking cuttings in fall means they skip the summer heat. This prevents excessive moisture loss while rooting. Cuttings have time to harden off before winter really starts, so they don’t get damaged by the cold.
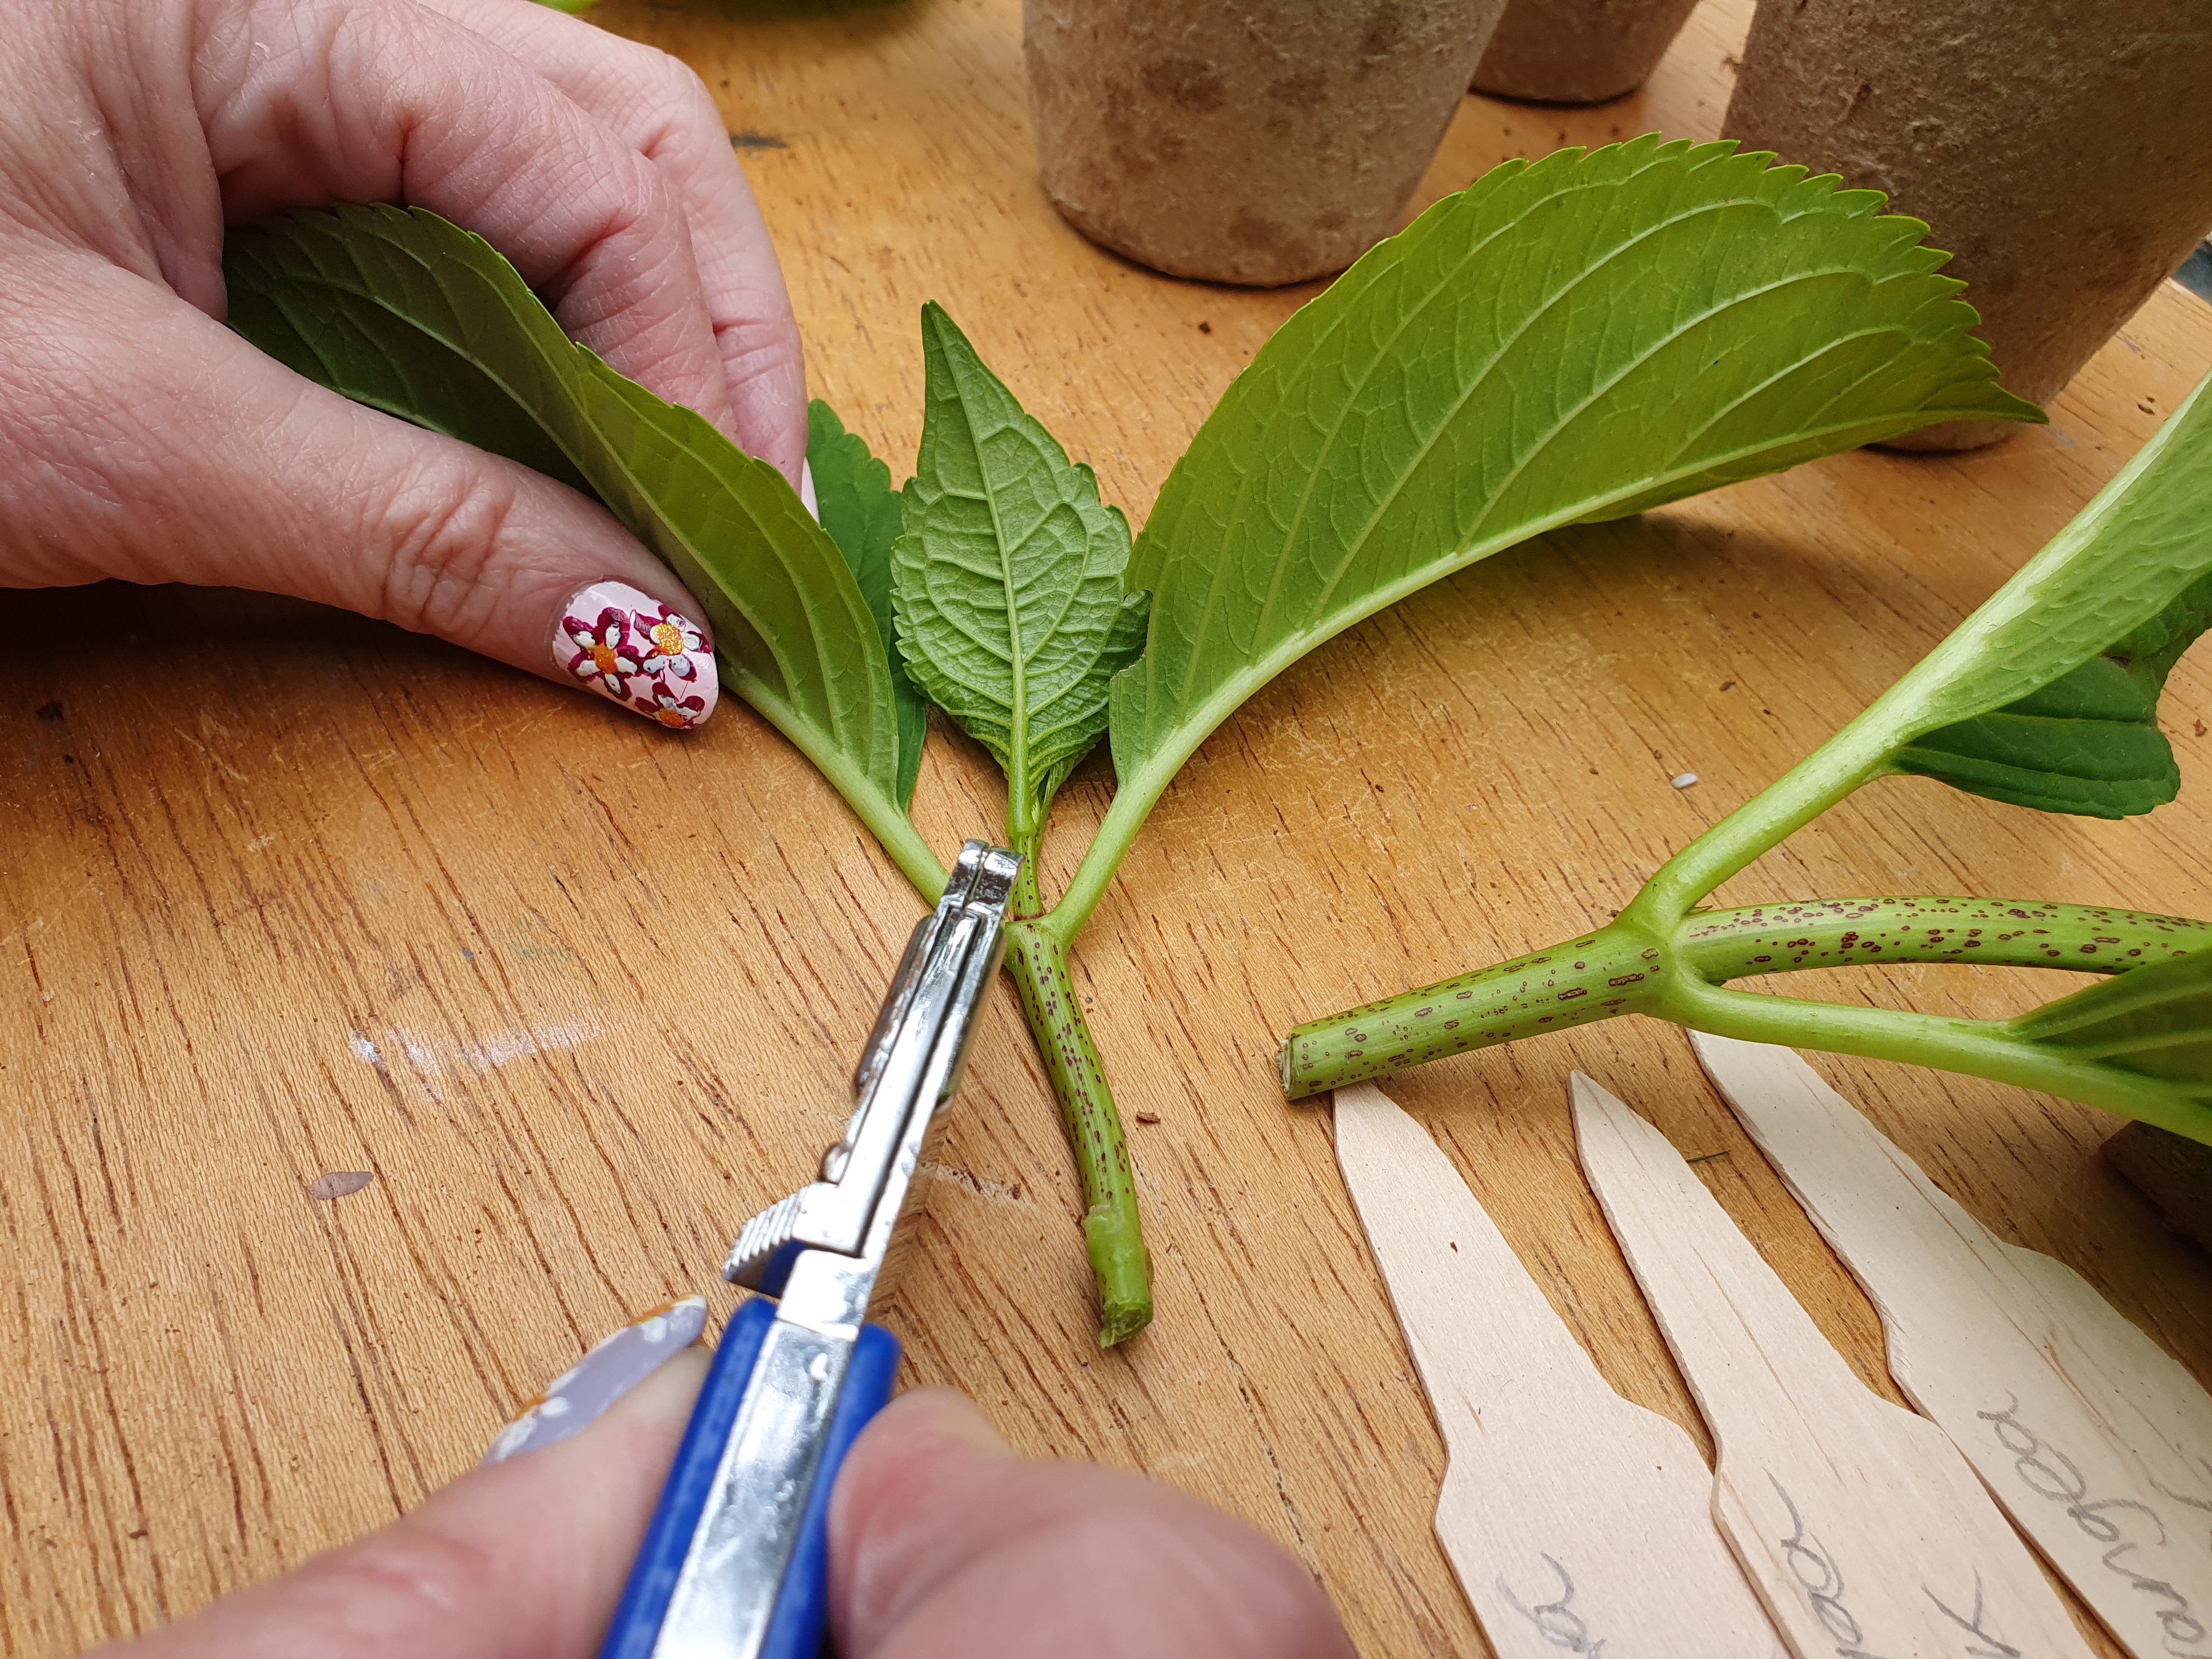
Selecting Healthy Stems for Hydrangea Cuttings
Pick vigorous shoots from the current season’s growth that show no signs of disease or insect damage. Look for mature stems with hardened wood rather than soft new growth.
Avoid any thin or weak stems. Also, don’t bother with flowering stems; the energy needs to go to making roots, not flowers.
Make slanted cuts just below leaf nodes using clean pruners. Cuttings should be 4 to 6 inches long. Remove the lower leaves, keeping just a few leaves at the tip.
Preparing Cuttings for Overwintering
Before overwintering, you need to encourage rooting on your cuttings. Follow these tips:
-
Dip cut ends in rooting hormone – This stimulates root development so your cuttings will be ready to grow in spring. Use a powder or gel product designed for woody stems.
-
Place in potting mix – Use a sterile, well-draining mix made for starting cuttings and seeds. Peat moss with added perlite or vermiculite is ideal.
-
Water thoroughly – Moisten the rooting medium so it is damp but not soggy wet. Proper moisture is key for propagation.
-
Provide bright shade – Some sunlight is beneficial but avoid hot direct sun. A bright window or lath house is perfect.
Following these steps sets your hydrangea cuttings up for successful overwintering and root formation.
Overwintering Methods for Hydrangea Cuttings
You have several options when choosing how to overwinter your hydrangea cuttings. Each has pros and cons to consider.
Bury in Trenches
Burying mimics natural overwintering. Dig a trench in a protected garden spot. Place cuttings vertically with the top 2-3 inches above soil. Backfill and mulch over the trench.
Pros – Excellent insulation if deep enough. Natural overwintering method.
Cons – Must dig up in spring to transplant. Risk of digging damage.
Use Cold Frames
A cold frame provides insulation while allowing air flow and light. Build a frame from straw bales, boards, etc. Add plastic sheeting or glass top. Ventilate on sunny winter days.
Pros – Protection from wind and extreme cold. Natural light for growth.
Cons – Must actively ventilate to prevent overheating. Can dry out.
Overwinter in Cool Location
An unheated garage, cellar, or enclosed porch protected from wind works well. Check soil moisture every 2-3 weeks and water just enough to keep damp.
Pros – Convenient overwintering spot. Easier to monitor.
Cons – Temperature fluctuations. Risk of drying out.
Sink Pots in Garden
Bury nursery pots with cuttings in the ground and mulch over the top. Leave just the rim exposed. Insulated by surrounding soil.
Pros – Convenient transplanting come spring. Natural cold protection.
Cons – Hard to monitor soil moisture. Risk of pots filling with water.
Caring for Hydrangea Cuttings Through Winter
Proper care during the overwintering months is vital. Follow these tips:
-
Check every 4-6 weeks for mold, drying out, or rodent damage.
-
Water only when soil is partly dry. Avoid saturated soil.
-
Keep at consistent cool temps between 33°F-40°F.
-
Ensure air circulation to prevent fungal issues.
-
Give bright light on warmer winter days to stimulate growth.
-
Move to unheated area if they break dormancy early.
-
Harden off in spring before planting outdoors.
With attentive care, you can overwinter hydrangea cuttings successfully.
Troubleshooting Overwintered Hydrangea Cuttings
Even when overwintering correctly, you may run into some problems:
-
Rotting stems – Caused by excess moisture. Improve drainage and water less. Discard any rotten cuttings.
-
No new growth – Some cuttings will not survive winter. Take extras allow for losses.
-
Dried out cuttings – Increase watering frequency. Soak pots to rehydrate.
-
Leaf scorch – Gradually introduce to sunlight in spring to harden off.
-
Leggy growth – Move to cooler area if they break dormancy too early.
Careful monitoring and adjustments will help overcome any issues that arise.
Transplanting Hydrangea Cuttings in Spring
Once spring arrives, it’s time to transplant your overwintered cuttings. Follow these tips:
-
Harden off cuttings before planting outdoors.
-
Choose a site with rich soil and partial shade.
-
Dig holes larger than the root ball.
-
Water newly planted cuttings daily for the first week.
-
Apply mulch to conserve moisture and reduce weeds.
With proper overwintering method, ongoing care, and ideal spring conditions, your hydrangea cuttings will thrive in their new garden location.
Overwintering Tips for Different Hydrangea Types
The various hydrangea species and cultivars have slightly different overwintering needs:
-
Bigleaf – Insulate old stems well since they bloom on old wood. Bury or use cold frame.
-
Smooth – Very hardy. Leave exposed and prune in spring.
-
Panicle – Hardy types that can remain uncovered. Prune in spring.
-
Oakleaf – Mulch well if overwintering in pots outside. Limit pruning.
-
Climbing – Protect from wind and cold which they are prone to. Overwinter in garage ideal.
Follow the recommendations for each type and you will have success.
Let Dormant Cuttings Flourish into Flowers
By taking cuttings in fall and overwintering properly, you can increase your hydrangea collection for free. Use these tips to help your cuttings survive winter and put out abundant roots when warmer weather returns. With the right care, dormant sticks will transform into blossoming hydrangea plants.
When to take hydrangea cuttings
The best time to take hydrangea cuttings is in late-summer. The cuttings in this set are semi-ripe, which means they come from this season’s growth but are old enough to have a woody base. The tips are still soft, though. The woody base prevents the cuttings from rotting when inserted into compost.
Overwintering Rooted Cuttings of Hydrangea (Part 1) | Protect the Roots from Frost
FAQ
Where should I store hydrangea cuttings?
Due to its woody nature, it’s not possible to propagate a hydrangea cutting in water, so you’ll need to insert them into a pot of gritty compost, instead. Keep your cuttings in a propagator to retain moisture until the roots have developed (usually after about six weeks).
Can you put hydrangea cuttings straight into the ground?
While you can put hydrangea cuttings directly into the ground, it’s generally not the most successful method. A better approach is to root them in a well-draining potting mix or even water first, then transplant them to the ground once they have established roots.
How to preserve hydrangea cuttings?
To preserve hydrangea cuttings, you can either dry them or propagate them into new plants. Cut the stems at an angle and take off the leaves. Then, put them in a vase with a little water or hang them upside down in a cool, dark place to dry.
How do you overwinter cuttings?
One of the keys to overwintering rooted cuttings under glass is to keep them on the dry side in bright frost-free conditions of around 7°C (45°F).