Putting old bricks around the edges of your garden beds and walkways is a cheap and eco-friendly way to give your outdoor space a vintage look. Weathered bricks give projects a sense of history and look great with any garden style, from traditional to modern. Keep reading to find out why brick edging is a good choice and how to do it yourself.
Why Use Bricks for Edging
Brick offers numerous advantages as a material for garden borders and edges:
-
gives you a clear edge to keep mulch, soil, and plants in. Blocks encroaching weeds and grass.
-
Lays flat so you can mow or string trim right up to the edge.
-
Stays in place for years unlike materials like wood that can rot or shift.
-
The interlocking pattern is resistant to frost heaving.
-
Comes in earthy, neutral shades that pair with any garden.
-
Can be installed in straight lines or used to form curves and custom shapes
-
Quick and easy to install without mortar or specialized tools.
-
Repurposes old bricks headed for the landfill reducing waste
Brick edging checks all the boxes for form, function and sustainability.
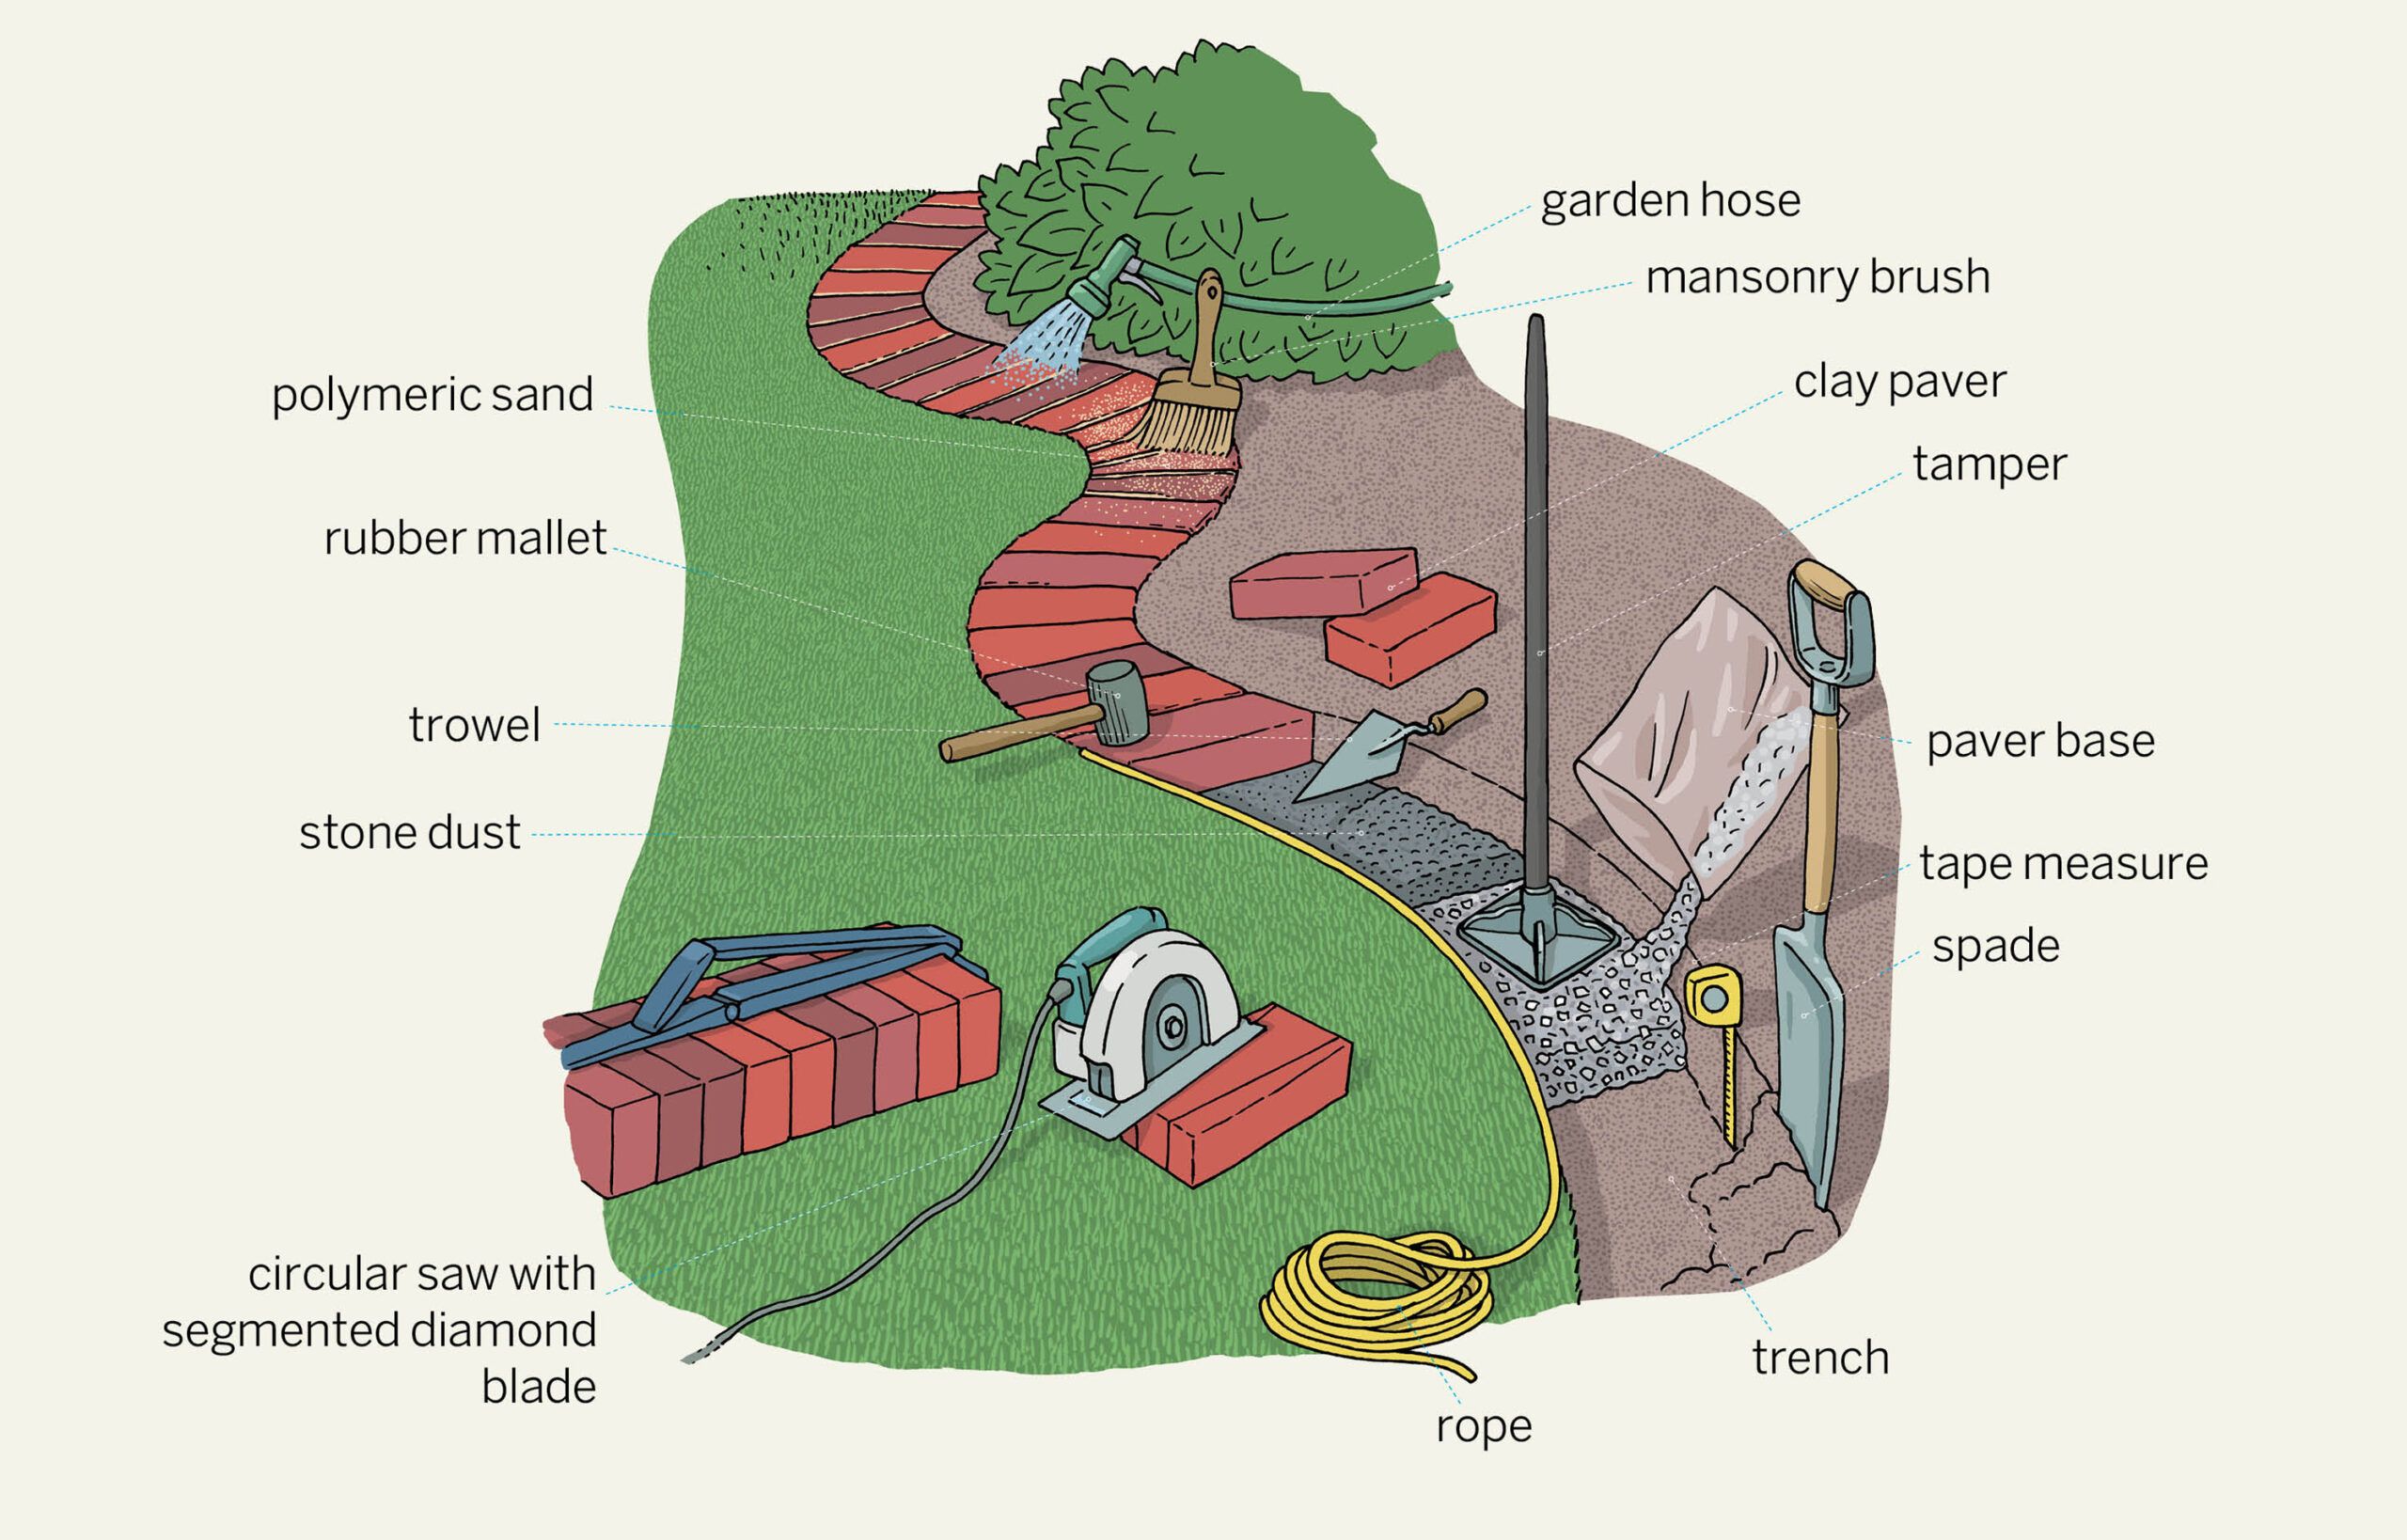
Gather the Right Materials
For a small to medium sized garden edge you’ll need:
-
Old bricks – Estimate how many by laying them end-to-end where you’ll install the border. Buy 10% extra.
-
Shovel and spade for digging the trench to set bricks into.
-
Optional landscape edging tool for cleanly cutting the trench.
-
Sand or gravel to fill under bricks for drainage and leveling.
-
Mallet for tamping bricks into place.
-
Level to ensure bricks lay evenly.
-
Work gloves and eye protection for safety when handling bricks.
Prep the Installation Area
Proper planning makes the installation go smoothly:
-
Decide where brick borders would look best and function well in your layout.
-
Check that the ground is level enough for trenching or level it prior.
-
Carefully dig up any existing plants to temporarily set aside.
-
Use spray paint or stakes to mark a guideline for your trench.
-
Plan to use full bricks around the outer edges with halved bricks elsewhere.
With the prep work done it’s time to start digging!
Dig the Trench for Bricks
-
Outline the trench with spray paint or by scraping the ground with a hoe.
-
Dig the trench 4-6 inches deep and 4 inches wide using a shovel or edging tool.
-
Clear any debris and level the trench base and sides.
-
Dry fit a few bricks to ensure the trench dimensions are accurate.
-
Add a 1 inch layer of sand or gravel for drainage and to prevent settling.
Now you’re ready to lay those lovely vintage bricks!
Set the Bricks into Place
-
Begin in a corner, laying full bricks end-to-end tightly along the trench length.
-
Ensure each brick sits level with consistent height. Tap down with mallet if needed.
-
Fill in gaps around curves using cut bricks. Cut with a chisel to custom angles.
-
Frequently check levelness and make minor adjustments by adding or removing sand.
-
Once all bricks are laid, backfill the surrounding space with soil or mulch.
That’s all it takes to install a classic DIY brick garden edge!
Caring for Brick Edging
Brick borders are nearly maintenance-free, but here are some care tips:
-
Relay any bricks that settle or shift over time to keep edges neat.
-
Use a steel broom or string trimmer brush to remove grass and weeds.
-
Avoid digging close to the edging which can displace bricks.
-
Consider sealing bricks occasionally to maintain vintage patina.
-
In cold climates, install brick edging after ground thaws in late spring.
With just routine care, your brick edging can last for decades!
Get Creative With Brick Borders
Looking to go beyond basic straight lines? Try these creative variations:
-
Lay bricks diagonally in a herringbone pattern for visual interest.
-
Alternate bricks vertically and horizontally to highlight textures.
-
Shape graceful curves, geometric patterns like octagons or freeform designs.
-
Mix regular bricks with unique specialty bricks in different colors, sizes and shapes.
-
Incorporate bricks into 3D edging with pillars or loose stacking.
-
Outline steps, patios, trees and other hardscapes in addition to beds.
Let your imagination run wild! The possibilities with repurposed bricks are nearly endless. Any way you utilize them keeps reusable materials out of landfills. Then sit back and enjoy the lasting sustainability and vintage charm your handcrafted brick edging adds to your outdoor space.
Step-by-Step Guide to Installing Brick Edging
Ready to tackle installing DIY brick edging? Follow this simple step-by-step guide:
Gather Materials
- Old bricks
- Shovel
- Spade
- Landscape edging tool (optional)
- Sand or gravel
- Mallet
- Level
- Work gloves
- Eye protection
Prep the Site
- Decide on placement
- Check ground is level
- Dig up existing plants
- Mark trench location
Dig the Trench
- Outline 4-6″ deep x 4″ wide trench
- Clear debris
- Level base and sides
- Test fit bricks
- Add 1″ layer sand/gravel
Set the Bricks
- Lay full bricks tightly end-to-end
- Keep bricks level with consistent height
- Tap down with mallet as needed
- Fill gaps with cut bricks
- Frequently check level
- Make adjustments by adding/removing sand
- Backfill surrounding space
And that’s all it takes to create a beautifully defined garden edge with sustainability using recycled bricks. The end results will add vintage charm to your landscape for years to come.

Check the Depth
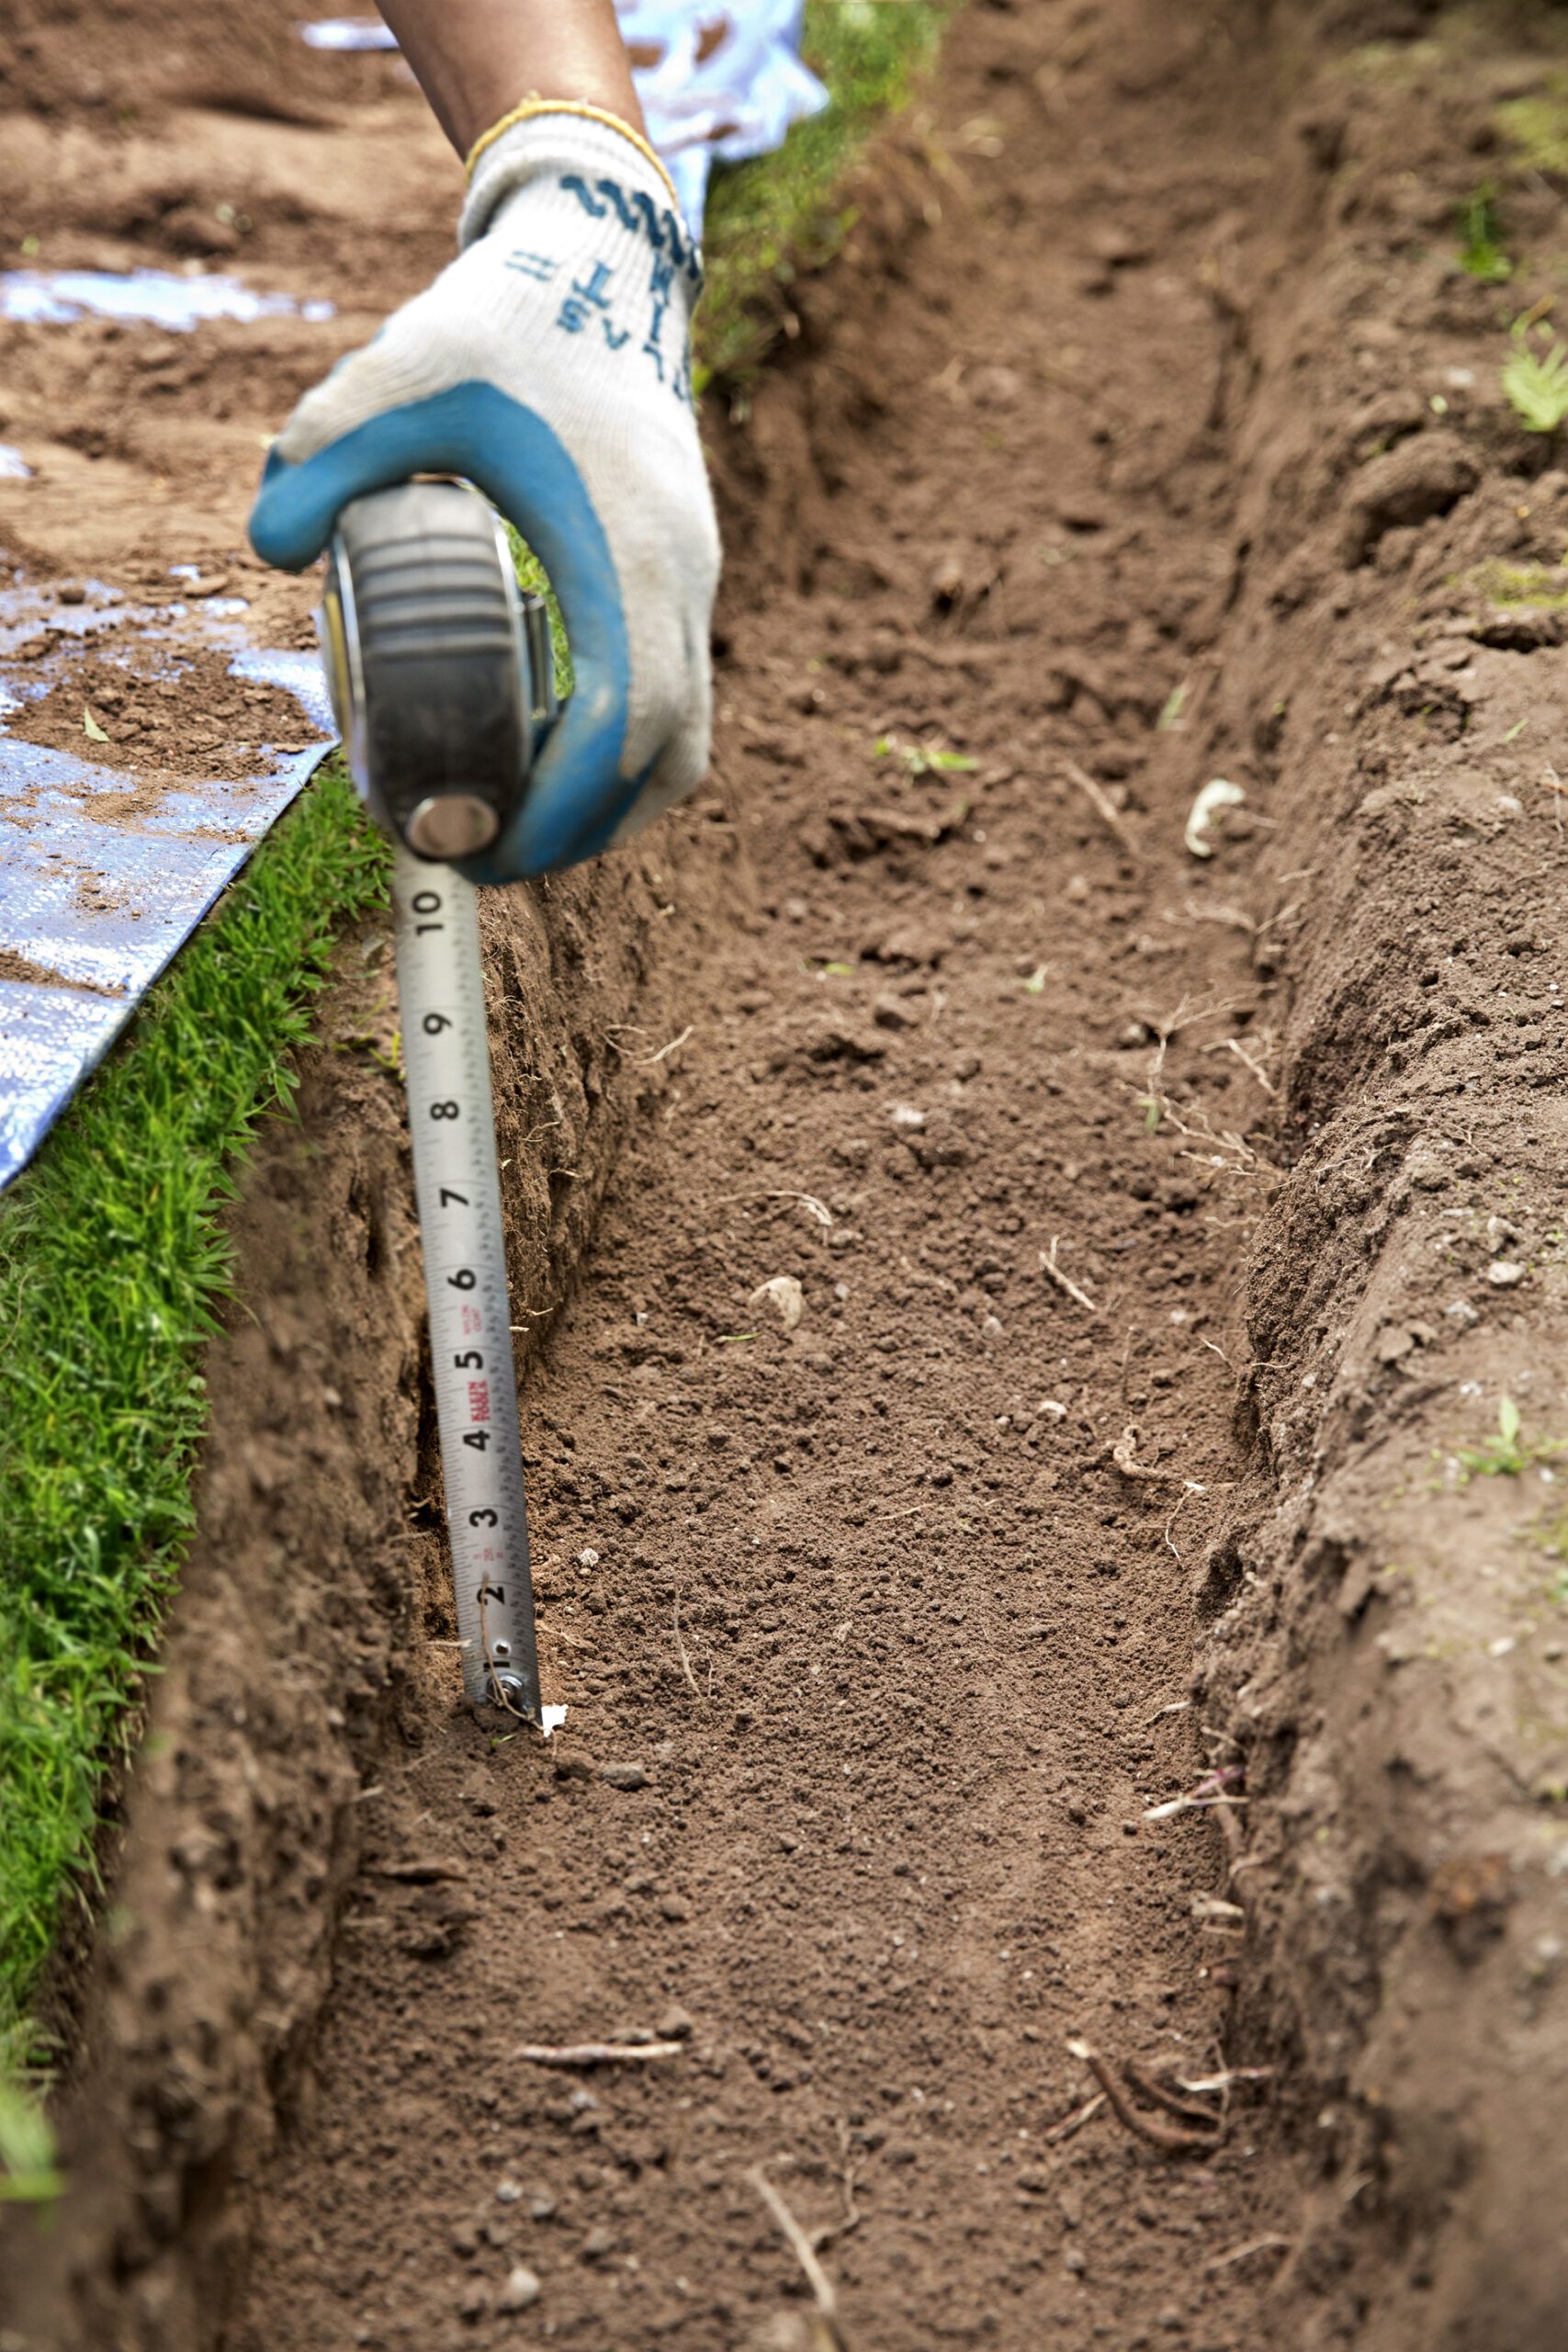
- After you’ve dug down past the topsoil, the soil should change color.
- Find out how deep your trench needs to be. It needs to be at least 6 inches deep so that you can put down a 2- to 3-inch layer of paver base, 1 inch of stone dust, and bricks that are level with the ground.
Overview of Brick Garden Edging
- SATURDAY: Form the trench (Steps 1–7).
- SUNDAY: Set the bricks (Steps 8–12).
How to Edge a Garden Bed With Brick | This Old House
FAQ
Can you use old bricks as pavers?
Old bricks make nice edging, but generally substandard pavers. -They’re soft, they’re going to be extremely irregular, necessitating large, uneven spacing filled with sand/poly-sand/whatever you’re using. The wide spacing will encourage plant-growth between pavers.
Is it okay to use old bricks?
Yes, you can typically reuse bricks, wood, and iron rods from a broken house in new construction, but there are several factors to consider: Condition of Materials: – Bricks: Check for cracks, chips, or structural integrity. Clean them to remove mortar or debris. – Wood: Inspect for rot, insect damage, or warping.