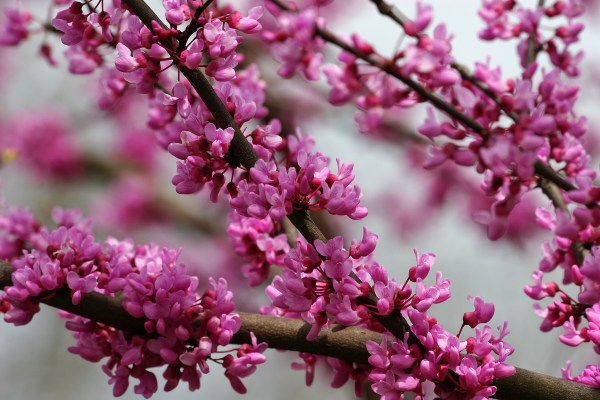
Redbud trees, with their striking purple-pink blooms in early spring and heart-shaped green leaves, are truly one of the joys of the garden. Their relatively small size makes them ideal for residential landscapes, and their resilience allows them to thrive in a wide range of climates and soil conditions.
If you already have a lovely redbud tree on your property, you may be wondering if you can get more trees for free by cutting them off. The good news is that you can grow new redbud trees from cuttings taken from an old tree as long as you know what you’re doing and are careful.
In this comprehensive guide we’ll walk through everything you need to know to successfully propagate redbud trees from cuttings.
An Overview of Redbud Tree Propagation
Redbud trees can be propagated through several methods, including seeds, layering, grafting, and by far the most common – taking and rooting stem cuttings. Starting redbud trees from cuttings is a simple, cost-effective propagation method that backyard gardeners can easily accomplish.
While propagation from seed can produce quality plants, starting redbuds from cuttings allows you to duplicate the exact characteristics you value in the parent plant. This includes flowering time, flower color, leaf shape, branching pattern, and overall form. Clones from cuttings will retain the genetics of the parent plant.
When to Take Cuttings from a Redbud Tree
Timing is important when collecting cutting material from redbud trees. This is the best time to take stem cuttings: late winter to early summer, when the plant is not fully grown. Mid-June through mid-July is generally best.
Avoid taking cuttings during times of active growth in mid to late spring when the stems are rapidly elongating and leaves are still expanding The carbohydrate levels in the stems are lower during active growth, which can impede root formation
You’ll have the best success with cuttings taken when the stems have hardened off a bit but still retain some flexibility. The cuttings need time to form callus tissue and initiate root growth before winter dormancy sets in.
Selecting the Best Cuttings from a Redbud Tree
Pick healthy stems from new growth that has firmed up – about the thickness of a pencil. Select branches growing from the outer canopy that receive direct sunlight if possible. Avoid branches that appear diseased, damaged, or distressed.
Look for stems that are smooth, supple, and free of blemishes. The ideal cutting is about 4 to 6 inches long. Aim for cuttings with at least two nodes or leaf joints. Remove all but the top couple sets of leaves to reduce water loss.
Make the bottom cut just below a node and the top cut right above one, at an angle to maximize the stem area for better water absorption. Use sterilized, sharp pruners to avoid crushing the stems.
Rooting Redbud Cuttings in Water
Plain water is one of the best ways to get redbud cuttings to grow roots. Prepare your cuttings as shown above, but don’t forget to leave a few sets of leaves at the very end. Get rid of any flower buds that are on the cutting. They can hold it back as it tries to grow roots.
Put the cuttings in a bowl of room-temperature water that is deep enough to cover the stems’ bottom one to two inches. Change the water every 2-3 days to prevent fungal growth. Put the container somewhere bright but not in direct sunlight.
Check for root formation in 3-4 weeks. Once a network of 1-2 inch roots has developed, plant the cutting into a container with well-draining potting mix, keeping the soil evenly moist. Gradually transition the young plant to more sun over a period of 2 weeks.
Rooting Redbud Cuttings in a Growing Medium
While water rooting certainly works, some gardeners have better success starting cuttings in a soilless potting mix. Rooting hormone powders can also speed up the process.
Moisten a sterile, soilless potting mix and fill 3-4 inch pots, leaving 1⁄2 inch from the rim. Poke holes with a pencil about 2 inches deep. Dip the end of each cutting in rooting hormone and place in the hole, gently firming the mix around it.
Cover the pots with clear plastic bags to create a humid environment. Place in indirect light, out of direct sun. Check periodically and mist with water if needed to keep the mix evenly moist.
Look for root growth in 4-6 weeks. Harden off the rooted cuttings for a week or two by gradually exposing them to more sun and less water before transplanting into larger containers or the garden.
Caring for Redbud Cuttings for the Best Root Growth
Proper care is crucial during the root formation period. Here are a few key factors that contribute to successful rooting of redbud cuttings:
-
Air Circulation – Some airflow around the cuttings helps prevent fungal issues but avoid full sun/wind which can dry them out.
-
Stable Warmth – Consistent temperatures around 70°F are ideal. Cooler temperatures can delay growth.
-
Moisture – Keep the root zone evenly moist but not soggy. Mist leaves periodically.
-
Light – Bright indirect light encourages root growth. Avoid direct hot sun.
-
Nutrients – Use a rooting hormone and a soilless mix to provide nutrients for new root tissue.
Respond quickly if cuttings show signs of shriveling, browning of leaves, or fungal growth. Adding a fungicide and enclosing in a plastic tent can help revive distressed cuttings.
Transplanting Rooted Redbud Cuttings
Once the cuttings have developed a vigorous root system, it’s time to transplant them to a larger pot or into the garden. Follow these tips for the best results:
-
Gradually expose to more sun 1-2 weeks before transplanting.
-
Water the cuttings thoroughly the day before.
-
Keep the root ball intact when transplanting to minimize disturbance.
-
Plant into well-draining soil enriched with compost.
-
Water in well and top dress with mulch to retain moisture.
-
Stake if needed to stabilize in windy areas.
-
Continue to water regularly until established, easing off gradually.
Troubleshooting Common Redbud Cutting Issues
Taking and rooting cuttings does require some patience and care. Here are some potential issues and solutions:
Problem: Cuttings shriveling or drying out
Solution: Increase humidity and moisture levels. Cover with plastic tent. Mist leaves frequently.
Problem: Leaves yellowing or cuttings losing vigor
Solution: Move to brighter (not direct) light. Avoid overwatering.
Problem: Cut ends browning
Solution: Use sterilized, sharp pruners. Recut tops of stems. Apply fungicide if fungal.
Problem: Few or no roots forming
Solution: Take cuttings earlier next year. Use rooting hormone. Ensure warm temps.
The Reward of Growing Your Own Redbud Trees
While it does take some time and care, starting redbud trees from cuttings of a beloved tree in your own landscape is incredibly rewarding. Taking cuttings also allows you to propagate rare or hard-to-find cultivated varieties.
Transplanting Saplings or Bare Roots
When the ground is soft, early spring or late fall are the best times to plant a sapling or bare root tree.
Pick a spot with the right sun exposure and spacing from other plants or structures – we cover this in more detail in our redbud growing and care guide.
Once you’ve nailed down the right spot, dig away. Make sure you aren’t digging into any utility cables.

Dig a hole that is twice as wide and twice as deep as the container that the sapling is currently growing in, or three times as wide and twice as deep as the root ball.
Fill in the bottom half of the hole with a mixture of well-rotted compost and native soil.
Remove the sapling from the container and gently loosen up the roots. Place it in the hole, and make sure it’s sitting at the same level that it was inside the container.
For bare root plants, the entire root ball should be buried sitting just below the soil line. The trunk can not tolerate being buried at all.

You don’t want the plant to be positioned any deeper or more shallow than it was before if it came in a pot filled with soil from the nursery. If necessary, adjust the quantity of soil in the base of the hole.
Fill in around the sides with a mixture of compost and native soil. Firm the soil around the roots and water well. If the soil settles, add a bit more.
How to Make Cuttings From a Redbud Tree
FAQ
Can you start a red bud tree from a branch?
“Description: The simplest way to grow redbuds is to scarify seeds and plant outdoors in the fall. Cuttings are nearly impossible. Seedlings which may develop around mature trees are easily moved when very small.
How to grow a redbud tree from cuttings?
Growing a redbud tree from cuttings is possible but challenging, requiring specific conditions and timing. The best time to take cuttings is in spring or early summer, just after the flowers fade and leaves emerge. Softwood cuttings, typically taken from the tips of branches, should be about 6-8 inches long, with the lower leaves removed.
What are the disadvantages of redbud trees?
Redbud trees may face issues such as canker disease, causing branch dieback, and verticillium wilt, leading to wilting and discoloration of leaves.
Can you grow a tree from cut branches?
Starting a tree from a branch is less expensive than buying from a nursery and faster than growing from seed. Plus, if a particular tree species is already thriving in your yard, odds are the next one will, too. In some cases, growing a new tree from a branch is a faster method than traditional planting. Apr 23, 2025.