Listen, I know the struggle with nandina all too well These seemingly innocent shrubs can turn into a real nightmare for gardeners After years of battling these persistent plants in my own garden and helping countless clients, I’ve learned every trick in the book to get rid of them for good.
Why You Might Want to Remove Nandina
Before we dive into removal methods. let’s talk about why you’d want to kick this plant to the curb
- It’s super invasive – spreads like wildfire through seeds and underground roots
- Contains toxic compounds – dangerous for pets, livestock, and even birds
- Crowds out native plants in your garden
- Can make your house look abandoned (my wife’s exact words!)
- Attracts unwanted pests like root knot nematodes
Effective Methods to Remove Nandina
1. The Dig-and-Pull Method
Best for younger plants and small areas:
- Loosen soil around the plant with a shovel or garden fork
- Pull up as much of the root system as possible
- Warning: This is gonna be a workout! The roots are tough
- Remove ALL root pieces – even tiny fragments can regrow
2. The Cut-and-Cover Technique
This method requires patience but works well
- Cut all stems down to ground level
- Cover the area with heavy black plastic or landscape fabric
- Secure edges with stakes or rocks
- Leave covered for at least 12 months
- Check periodically for sneaky shoots trying to escape
3. Chemical Warfare (When Nothing Else Works)
If you’re dealing with a massive infestation:
- Cut stems close to ground level
- Immediately apply glyphosate or triclopyr to cut surfaces
- Do this within 5 minutes of cutting for best results
- Wear protective gear (gloves, long sleeves, eye protection)
- Best timing: fall or early spring when plants are actively growing
Pro Tips from My Experience
Here’s what I’ve learned the hard way:
-
Be Patient: This isn’t a one-and-done job. It could take one to three growing seasons to get rid of all established plants.
-
Stay Vigilant: Check for new sprouts weekly during growing season. Those sneaky little shoots can pop up anywhere!
-
Timing Matters: I’ve found early spring or fall works best for removal efforts.
-
Prevention is Key:
- Remove berries before birds can spread them
- Monitor property edges regularly
- Consider replacing with non-invasive alternatives
What Not to Do
Avoid these common mistakes:
- Don’t leave root fragments behind
- Don’t add nandina to compost piles
- Don’t ignore new seedlings
- Don’t get discouraged if first attempt fails
Alternative Plants to Consider
You might need something to fill the space left by nandina after it’s gone. Here are some better options:
- Dwarf varieties of nandina (if you still like the look but want less hassle)
- Native shrubs for your region
- Ornamental grasses
- Small evergreen shrubs
Final Thoughts
I’m not going to lie: getting rid of Nandina is hard. But with persistence and the right approach, it’s totally doable. Just remember, this is a marathon, not a sprint. Trust someone who has been there: your hard work will pay off in the end!
Got questions about removing nandina from your garden? Drop them in the comments below! I’d love to help based on my experiences battling these stubborn plants.
Remember: If you’re using herbicides, always follow label instructions and local regulations. Safety first, folks!
FAQs
Q: How long does it take to completely remove nandina?
A: Typically 1-3 growing seasons for complete elimination of established plants.
Q: Can I just keep cutting it down? A: No, that will only make it grow more. You gotta attack those roots!.
Q: What’s the best time of year to remove nandina?
A: Fall or early spring when plants are actively growing but not at peak strength.
Q: Is it okay to burn nandina?
A: Not recommended due to toxic compounds in the plant.
Stay persistent, gardening friends! You’ve got this!
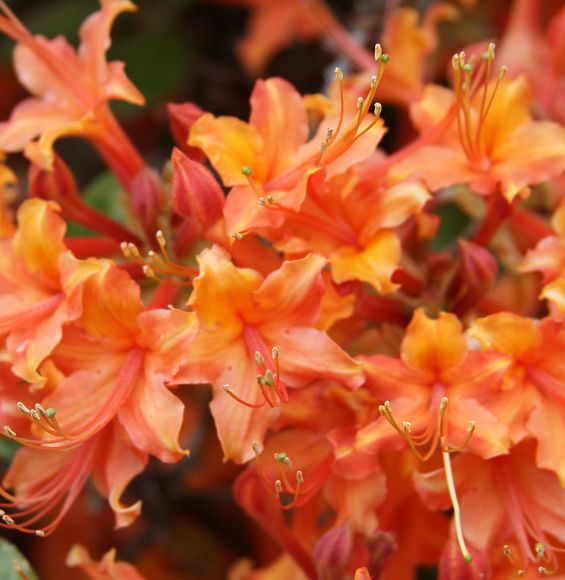
Eastside Azalea Collection
Despite the native azalea holding the title of Georgia’s State Wildflower, it is underused in the landscape. The Atlanta BeltLine Arboretum is now home to the largest public native azalea collection in the Atlanta Area with over 300 azaleas on display. The collection highlights over 25 species, cultivars, and varieties, and is home to all 13 azaleas native to the state of Georgia. This collection focuses on named cultivars (varieties that have been selected for depending on color, size, bloom time, etc. ) within two series called the Georgia Moon Series and the Sunrise to Sunset Series. The Georgia Moon Series will have fragrant white-blooming Georgia native species, and the Sunrise to Sunset Series will be comprised of Georgia native species in warm orange, reds, and soft yellows blooming from March – July.
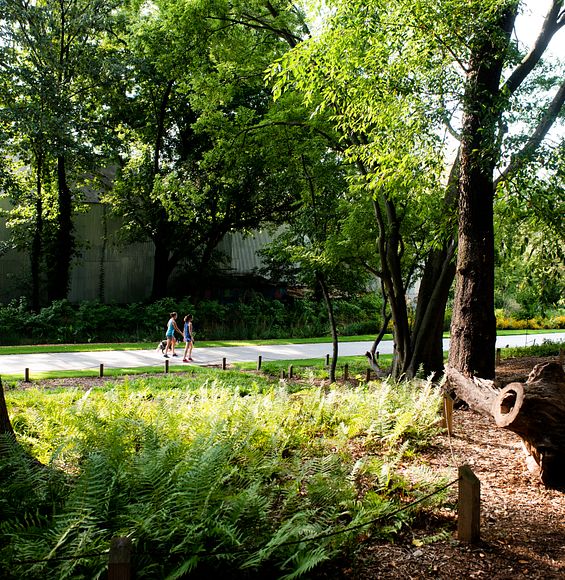
A unique feature in horticulture, the Stumpery Garden is open to the public for learning and exploring and shows how trees can be used in a beautiful way. Stumpery gardens utilize dead, fallen, and storm-damaged trees as an asset to the garden – providing critical habitat for beetles, frogs, birds, and small mammals such as chipmunks. Whole logs are placed upside down to display their root structure, and logs, branches, and pieces of bark are arranged to form walls and archways. Plants such as ferns, lichen, mosses, soft grasses, and trailing plants are encouraged to grow on and around them.
Take a virtual tour of the Stumpery Garden here.